Surrealism: Black & White with Color Pencil
Posted by Niki Cassidy On March 13, 2019
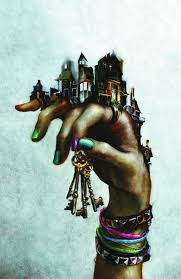
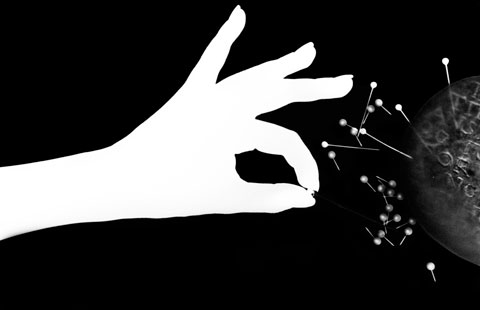
GOAL: students will take a picture of a hand/s. It can be their own or belong to someone else. Then, they will research other images to combine with the hands to create a surrealistic composition. Multiple elements and principles will be used, with a focus on unity, proportion, space, and contrast.

Process/Steps:
– take a picture of your own hands or those of someone else
– look for additional images that can be combined with the hands in an interesting way. images can be from the internet, your own photos, or other sources.
– using surrealism as your foundation, combine all of your collected images.
– lightly draw the composition on brown kraft paper in regular pencil.
– use black and white color pencils to shade your images. do not mix the black & white. value and contrast are essential in this assignment.
Videos to help>>>>
Black Box Student Exhibition
Posted by Niki Cassidy On January 7, 2019

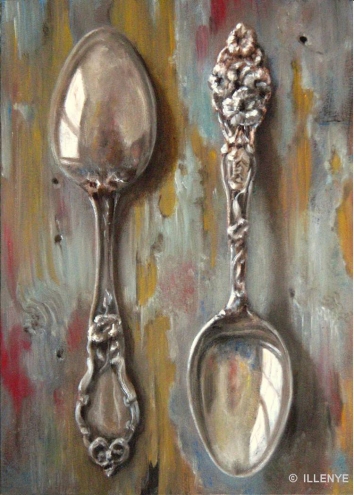
ADV. Painting and Drawing-Still Life: Reflective Surfaces – Form, Value, Proportion, Space, and Texture
Posted by Niki Cassidy On March 12, 2018
GOAL: students will be provided a still life composition that focuses on reflective objects. students will apply all of the elements of art to complete this drawing: line, shape, form, texture, color, value, and space. reflective surfaces: still life
Process Steps
– observe the still life.
– determine how to arrange all of the items on your paper, utilizing the entire space.
– lightly draw the still life – sketch lines or general shapes to represent each item.
be sure all objects are represented before finalizing each item.
– shade each object to best represent the texture, highlights, and shadows. contrasting values will be necessary to successfully represent the reflective surfaces.

The D.H.S. Outstanding Senior Artist Competition
Posted by Niki Cassidy On March 6, 2018
The D.H.S. Art Department is looking for outstanding and creative senior artists to participate in a duel of paintbrushes. Just kidding about the dueling paintbrushes; but there is no joke about the competition in which senior artists are selected to represent our school for prestigious awards. To participate, submit a portfolio of your finished artwork along with the Application for Senior Artist 2018. All important dates are listed on the application. Questions or concerns – contact one of the three art teachers.
Below are links for Application for Senior Artist 2018:
Annual Congressional Art Competition
Posted by Niki Cassidy On March 6, 2018
You won’t want to miss the opportunity to participate in the 2018 Congressional Art Show (12th district) themed “An Artistic Discovery”; your work could be selected to hang at the White House for 1 year! 
Participants can deliver all of the necessary paperwork (filled out/w/required signatures) and their matted artwork to the art department by Friday, April 13th, 2:30 pm.
The show is scheduled to take place on May 5th, 2-4 pm at the Wayne County Community College in Taylor, MI.
For more info. visit the link: https://www.house.gov/content/educate/art_competition/
Best of Luck!!!
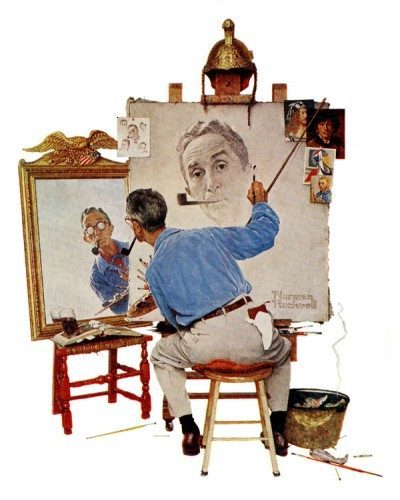
Figure Drawing-
Posted by Niki Cassidy On February 5, 2018
In order to improve your figure drawing you must practice. Here a few videos to help you and to offer different approaches to drawing the figure:
Drawing the Clothed Figure:
Here are some two minute poses to practice:
Happy Drawing
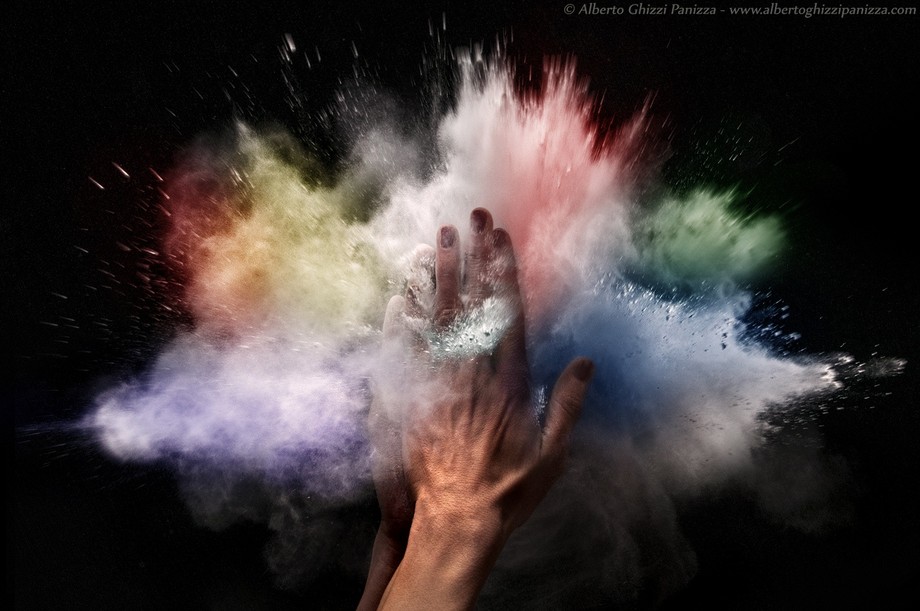
Advanced Photography- Fast Shutter Speed vs. Slow Shutter Speed
Posted by Niki Cassidy On October 4, 2017
FOCUS: Movement, creative photography, and shutter speed
GOAL: To complete two photos that show both fast and slow shutter speed, while considering movement.
Fast Shutter Speed High ISO

Fast Shutter Speed
Slow Shutter Speed
Slow Shutter Speed

Slow Shutter Speed
Intro to Photography-Photograms
Posted by Niki Cassidy On October 4, 2017
In this lesson, students produce three distinctive photograms to understand how design can communicate ideas. They explore opaque, translucent and transparent objects and combine them to create organic, geometric and symbolic designs. They learn about the technologies and processes of photography. After completing their photograms, students are encouraged to be more articulate about their design choices as they critique their works and write individual artists’ statements.


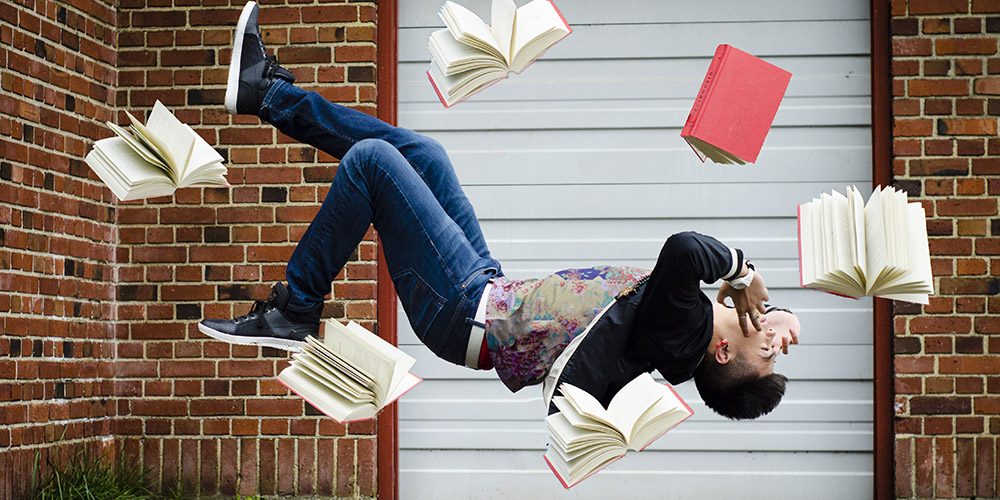
Photo 1- Levitation Photography
Posted by Niki Cassidy On September 27, 2017
Objective: Approach photography as a creative and artistic outlet. Have som e fun creating dream like “levitation” images.
Task: Work with a partner or tripod and timer and remote to set up the scene, any props necessary, lighting etc. to shoot a levitation photo.
This can be done though fast shutter speed and well considered jumping poses or through using a shot with props to “levitate” your subject and a second shot of the background, that can then be combined to eliminate the props.
Tips:
- the pose/posture of the body, drape of clothes and hair etc. are essential for the levitation effect
- decide the mood/emotion you intend to portray
- the location will impact the mood
- consider changing the tones and colors in photoshop
- what do you want to say?


| RUBRIC | |
GOALS OF Levitation Photography
|
|
COMPOSITION
|
|
CRAFTSMANSHIP/PRESENTATION
|
|
CREATIVITY
|
|
| COMMENTS: | TOTAL——————GRADE—————– |
Advanced Photography-Dramatic Portrait – Form
Posted by Niki Cassidy On September 22, 2017
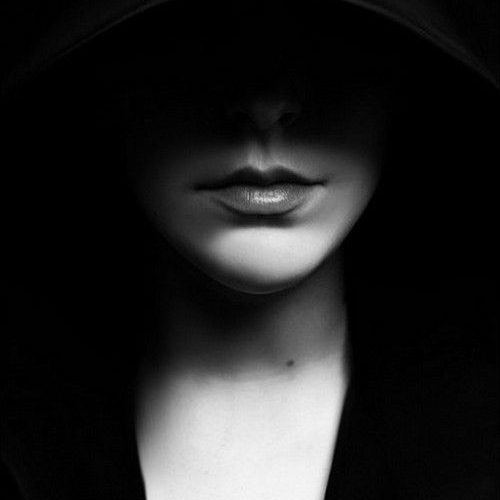
Dramatic Portrait
Terms: Form, ISO
GOAL: To complete a portrait while adjusting ISO and considering dramatic lighting to show form.
Task: Students will complete a portrait while adjusting ISO and considering dramatic lighting to show form.
CRITERIA:
- 3 images
- Images should each show a different form of dramatic lighting
- Overall piece should show form
- Finished images should be in .jpg format
STEPS:
- Begin by opening one of your photos.
- On the bottom right side, select new layer. Name the layer “gradient”. Hit OK.
- Be sure to work on the new top layer when adding the gradient.
- If you are unhappy with the gradient, you can delete the layer and start over. This only works if you’ve followed the steps above.
- On at least ONE image, apply a gradient.
- If you are happy with the gradient you chose, flatten the image. Do this by RIGHT CLICKING THE BACKGROUND LAYER -> SELECT FLATTEN IMAGE.
- You can now save your file as a .jpg and submit it.
- You can repeat this on the other photos if you choose…as long as at least one photo has an added gradient.
*IMPORTANT: Be sure to always save your file as a .PSD until you are ready to flatten the image and
submit it. If you do not do this and the layers become merged/ image flattened before you’re are
finished, you will not be able to make further changes to those layers.
Video- What are layers in Photoshop?
Adding a Vignette in Photoshop.
