
Below are some art lessons, drawing guides, art history research and reflection questions, art websites, art games, and more ways for you to have fun and learn with ART!
If you are not completing work in an iLearn course for art, you may choose one of the projects on this page per week instead. Email a picture of your artwork to brucep1@dearbornscools.org when it is finished.
Yoga Gesture Drawings
Look at someone who is doing yoga and quickly try to capture their gesture by looking closely at what their body is doing and drawing it! You do not need to add details to these drawings, but if you want to take it a step further you can!
Cut Out Fashion Design
Coin Spinners
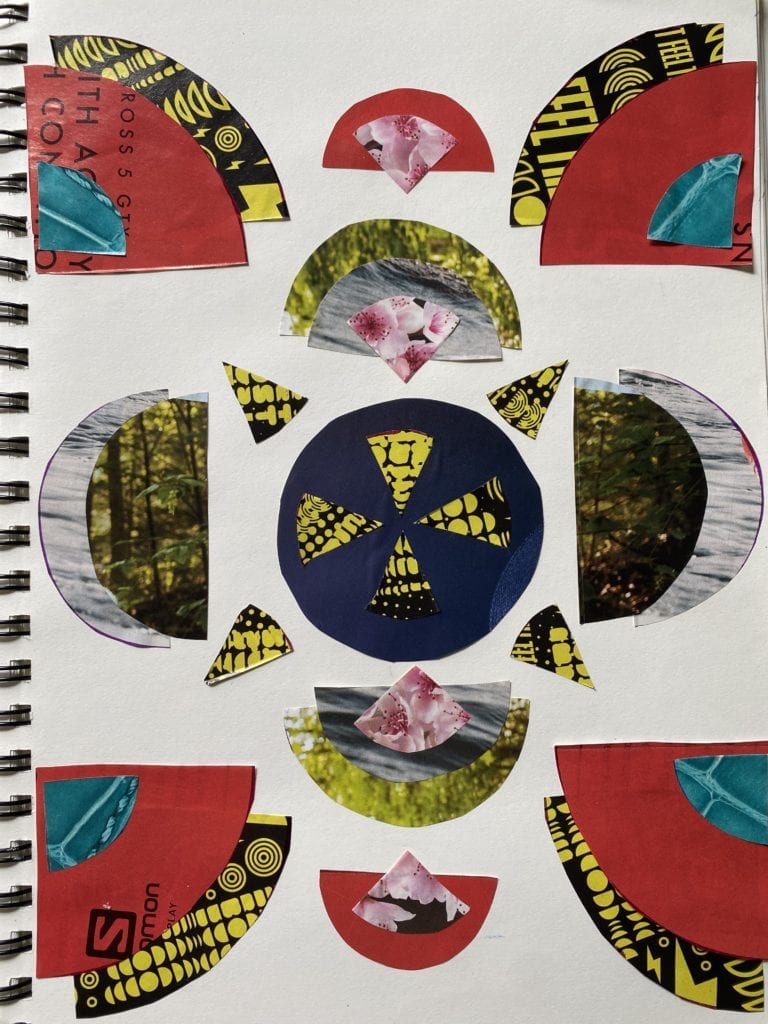
Magazine Circle Collage Using Fractions
Floating Cube Drawing Illusion
Here is the floating cube drawing video that was shared in one of our Big Blue Button meetings. See if you can create this illusion at home!
Past and Future Hand Drawing

Pop Out Interior Design

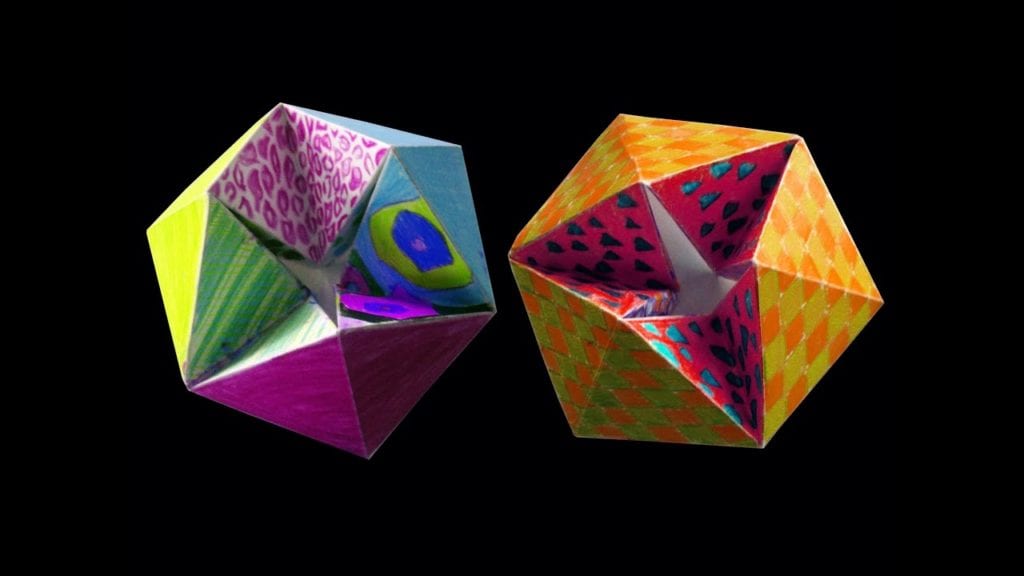
Origami House


Cardboard Robots and Crayon Rubbings
James Rizzi Overlapping City Buildings

Symbolic Self Portrait
You can create a symbolic self portrait by choosing 3 or more symbols that will show something about you. Symbols are objects or drawings that stand for, or represent, something else. Draw and color your symbolic self portrait and don’t forget to email me a picture when it is done!
Color Scavenger Hunt Collage
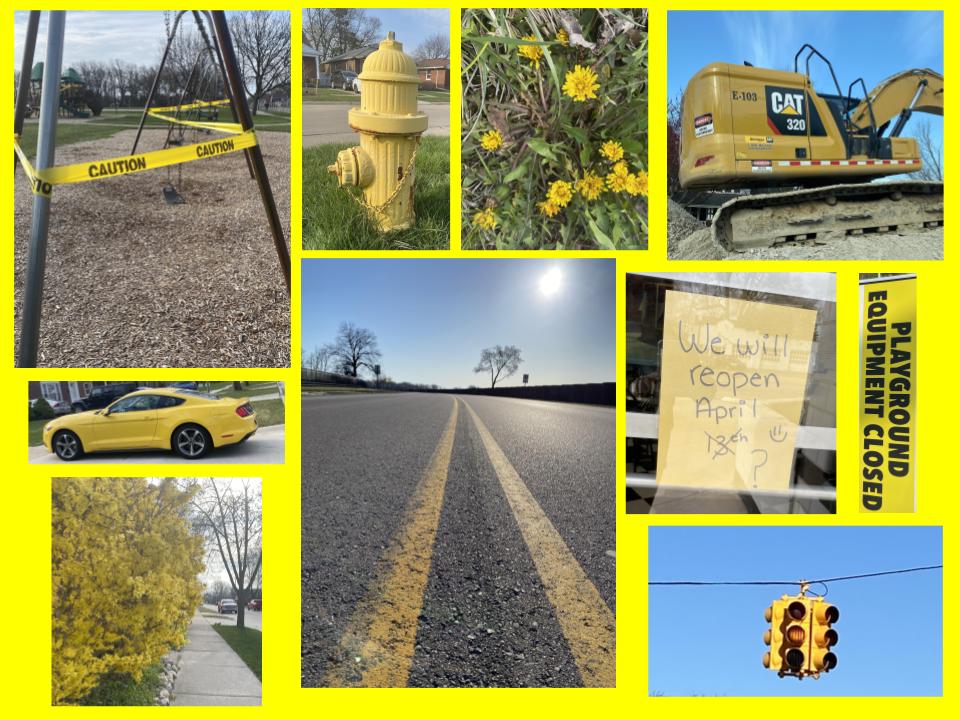
Step1: Choose a color
Step 2: Go for a walk and look for things that are your chosen color
Step 3: Take pictures of the color objects you see
Step 4: Upload your photos to your Google Drive, email them to yourself, or download them to the device you are going to be using for your collage
Step 5: In Google Drawings, add your images and collage them together in a way that looks nice to you.
Step 6: Share or send me your finished collage!
Digital Identity Collage
Create a collage on the computer, or on paper, that shows an image or drawing of yourself surrounded by things that you like or things that describe you.
Here are some examples of identity collages made on paper using crayons, paint, scissors, glue, and magazines or printed pictures:


OR you can make your collage on the computer using Google Drawings. The video below shows the directions for this using Google Drawings.
For more information on how to use Google Drawings, enroll in the Digital Art iLearn course with the code 6xkf6w
One Point Perspective Drawing
Create a drawing that shows perspective! The word perspective is referring to a point of view. How does the appearance of objects change with your point of view, or perspective? Below is an example of someone drawing a road that appears to get smaller, or more narrow, as it moves away from the viewer. Drawing objects smaller as they move up your paper helps to show perspective and can help to create more realistic drawings. Try these steps below, but add different objects along the side of and on the road!
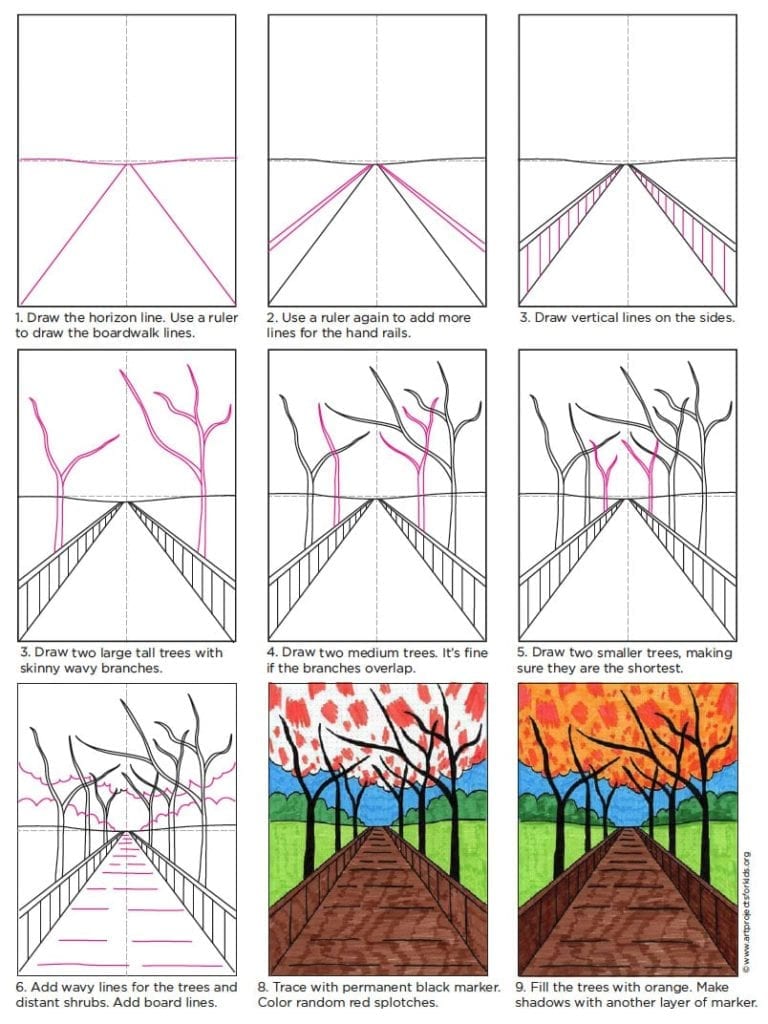
Below is a link with examples of 4th grade perspective drawings from Geer Park a couple of years ago.
Mandala Drawing Website
Here is a link to a website where you can create symmetrical drawing designs that often resemble mandalas!
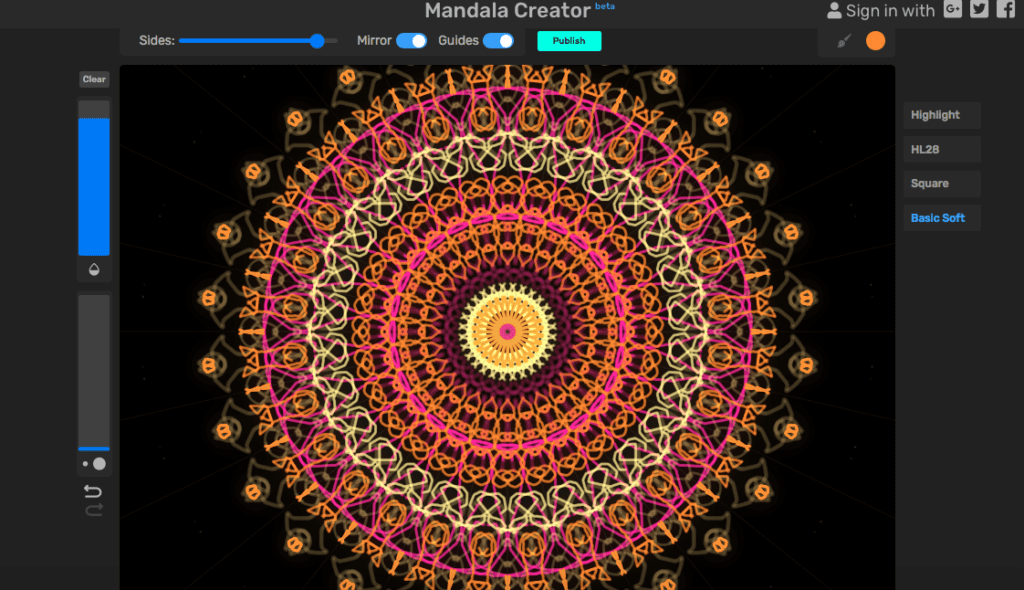
After you have created a mandala, use the resources you have to try to answer these questions below. You can email your responses or write them down on paper and bring them back to school.
1. What is a mandala?
2. Where in the world are mandalas made?
3. What materials are mandalas made with?
4. Creating a mandala is often thought to be relaxing or meditative; how did you feel when you were creating your mandala?
If you loved creating this mandala, try to create your own mandala on paper or with sidewalk chalk next!
Cardboard Animal Sculpture
Use recycled cardboard to create a standing animal sculpture! Used cereal, pizza, cracker, or delivery boxes can be drawn on and cut for this project. Make sure to get an adult’s permission before cutting a box that you find. If the cardboard you are using is very thick, you may need to ask an adult for help to cut safely.
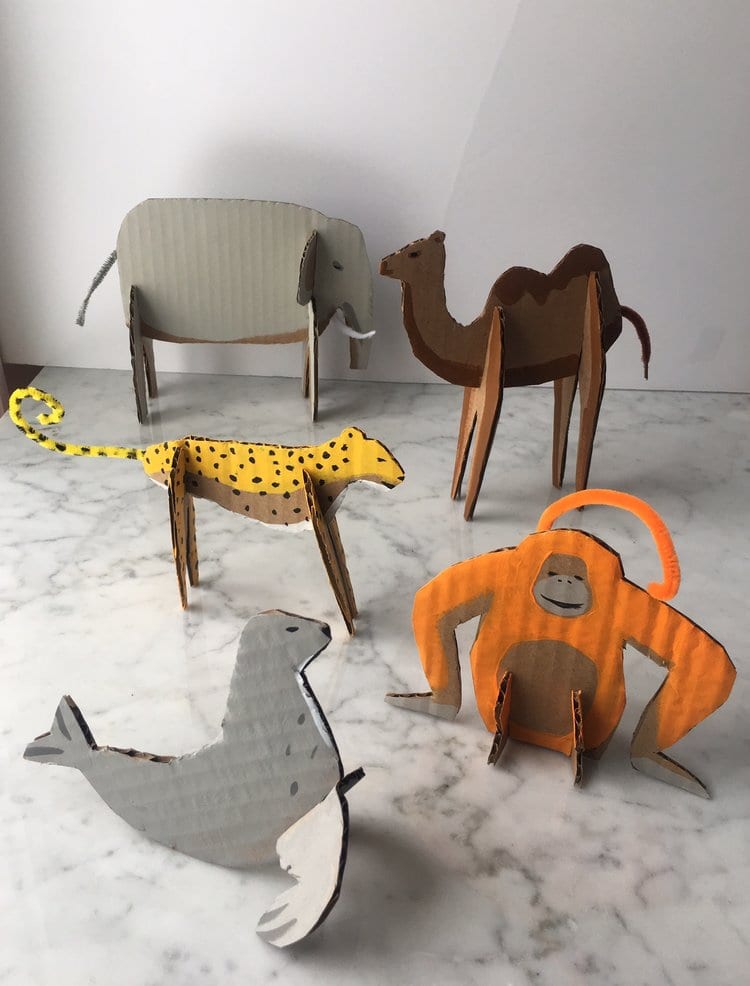
Sketch the animal you want to create first. Then think about what parts of your animal will need to touch the ground in order for your sculpture to stand.
HERE is a link to templates for some animals. Use the templates, or create your own! I will make a paper template first when I try this. Then, when I see that the aper template works, I will try it with cardboard!
You can add color to your animal with crayons, paint, colored pencils, gluing paper to the cardboard, or you can leave the cardboard showing an not add color!
Pick 2 Reflective questions to answer when you are finished:
1. Why did you choose this animal to make?
2. Where in the world does your animal live?
3. What are the foods that your animal eats?
4. What was the most difficult part of making your sculpture?
5. If you were to do this again, what would you do differently? Why?
Look at how Mrs. Russell created a cardboard colorful cow!


Here is another option to make a sculpture with cardboard, but you can make it look like something other than an animal:
Tessellations
Tessellations are designs that have shapes repeated that fit together without gaps or overlapping. Below are a few examples of tessellations that fifth grade artists at Geer Park made a few years ago.
Here is a website to create a digital tessellation.
Here are two videos to demonstrate how to make your own tessellation with paper!
Comics and Comic Books
I love how art can tell a story! For this project, you can tell a story with your artwork through the art of comics!
First, make up your own story! It helps to write your story down, plus writing is a great opportunity to practice your creativity!
Then draw a layout for your story. Below are a few layout ideas.


Comics do have some words and dialogue, but think about how you can communicate most things through your drawing instead of writing. For example, if your story takes place in a jungle, you can draw jungle plants and animals in the background instead of writing a sentence about the setting. If you character is mad, instead of saying this, how can you change the way you draw their face and body to show anger?
There are some fourth grade in-progress examples of comic page designs from Geer Park in the link below:
Instead of making a comic page, you can also make a comic book! Below is a video that shows how to make an 8 page mini-comic book from one piece of paper:
Origami Jumping Frog
I know there are some origami-loving artists at Geer Park! Here is an origami jumping frog tutorial on YouTube. This YouTube channel, MP Easy Origami, has many other video tutorials to follow too if you want to try more! Remember to start with a square paper. I like to cut a square from a newspaper when I make origami at home; because newspaper is so thin, it makes folding much easier!
Origami Dragons
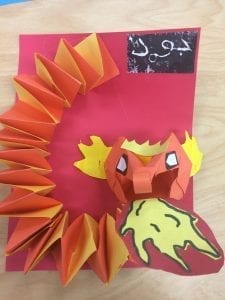
Here are two videos to show the steps to make an origami dragon head and then the body. Some of my past artists at Geer Park and Lowrey have made these before, some of their examples are below, too.
Google Quick Draw
Google Quick Draw is a fun game where you have 20 seconds to draw the assigned word. If the word is one you don’t know, hit the skip button at the top left corner.
OP Art
Op art stands for artwork that shows an optical illusion, or tricks your eye into thinking something is happening that really isn’t. Some Op art looks 3-D but is really 2-D. Below are different video tutorials you can follow to draw your own op art!
Andy Goldsworthy Nature Designs
With the weather warming up, it’s a great time to get outside and create artwork with the nature that is surrounding you!


The images above are form an artist named Andy Goldsworthy. He uses nature to create beautiful designs and then photographs them. Many of his designs show symmetry and patterns.
Go outside and create your own artwork with nature! You can use sticks, leaves, flowers, weeds, dirt, wood chips, stones, or whatever else you can find!
Forced Perspective Photography
Here is another artwork where you can think about perspective, or point-of-view! Arrange a photo to make it look like something is a different size, in a different location, or changed in some way because of perspective! You can set your camera on a self-timer, or have a family member take the photo for you. Below are some examples.


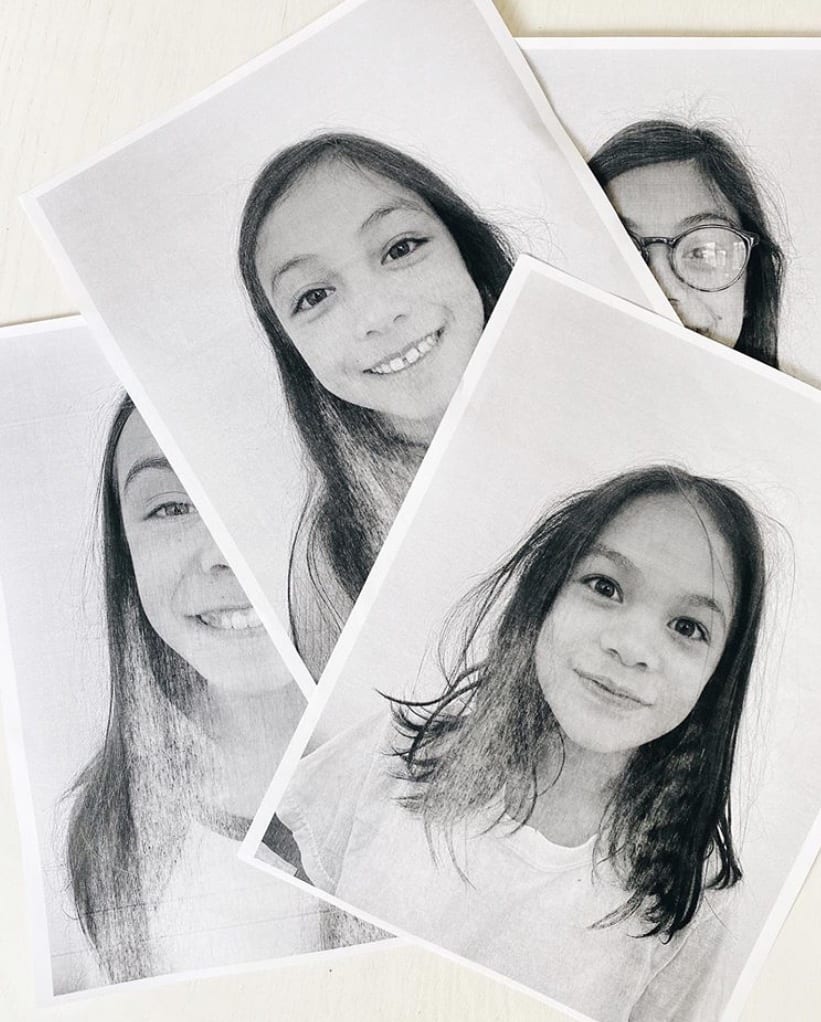
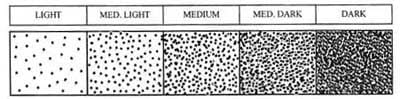
Stippling Self-Portrait
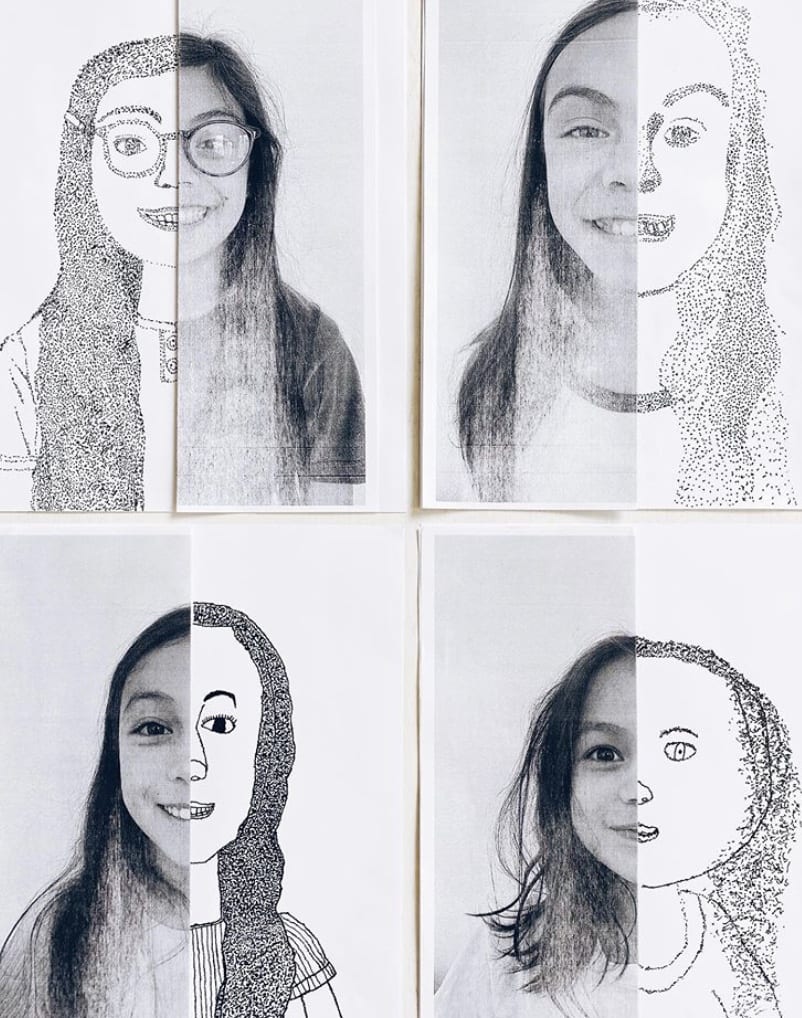
For this project, you will need a photo of yourself, or you can look in the mirror to see yourself and you can draw your whole face instead of just half! You will also need a pen or marker. Another way to make this would be in GoogleDraw, PaintZ (if you are using Google Chrome), or another online drawing website.
First print out your photo. Then cut it in half.
Next you can use your pen or marker to begin to add each part of your face, but only using small dots! When an artist fills spaces with dots like this, it is called stippling. The value scale below shows how you can add more dots that are close together to show dark values, and less dots that are spread out to show lighter values.


Flextangles or Flexagons
This project uses a piece of paper, something to color with, scissors, and glue. Below is a link to a template for these flextangles, you can print it out or you could trace it onto a piece of paper if you do not have a printer!
Below is a link to a site that has steps and a video to follow to create your flextangle!
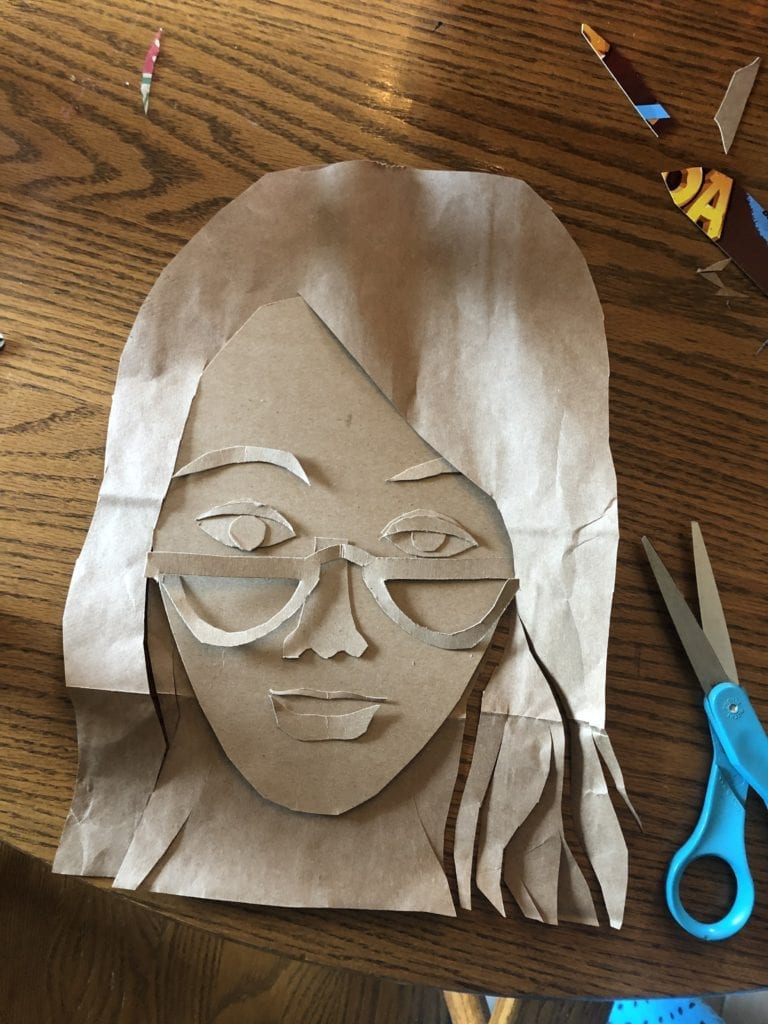
Cardboard Self Portraits
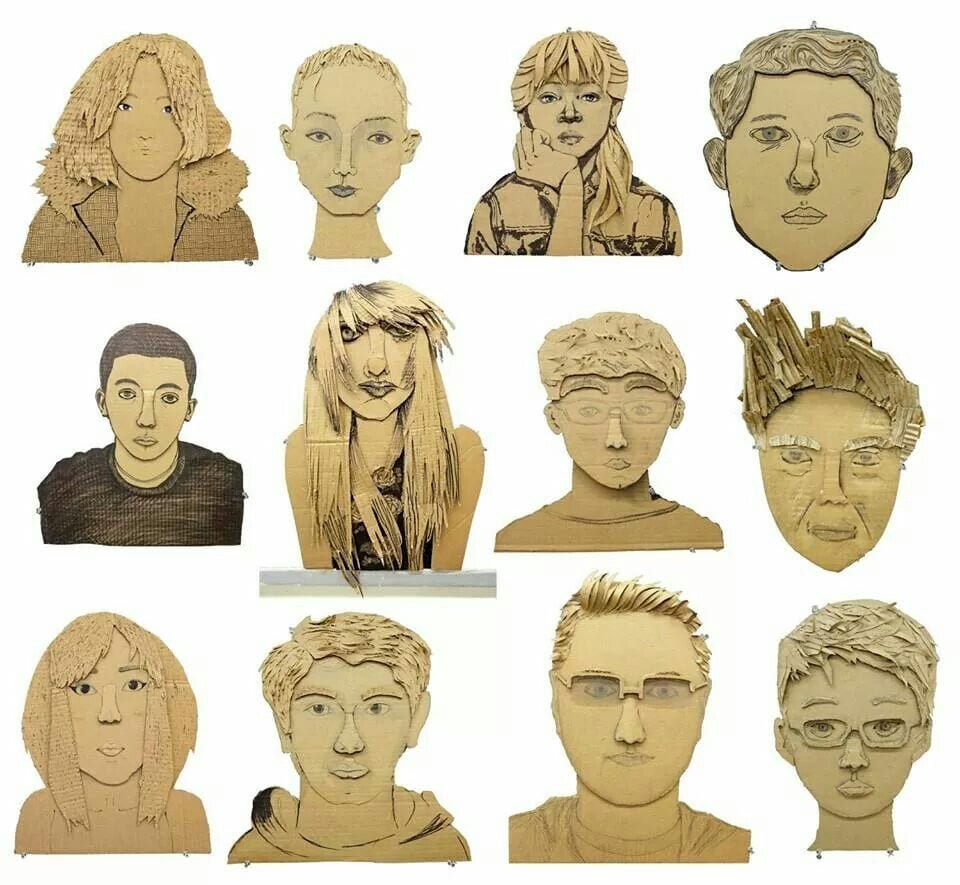
This project will require cardboard, scissors, and glue or tape. You could choose to color your self portrait with crayons, markers, or even paint when you are done, too!

First you will need to cut out a head shape from your cardboard. Then you can cut out shapes for eyes, ears, a nose, and other parts of your face. What do you think would be the best way to show your hairstyle?


Paint With Coffee
If you don’t have paint at home, or if you want a new art challenge, try to paint with coffee!
You can use different amounts of coffee and water to create lighter and darker browns to use. Below are some images of coffee paintings I found online! I have also put a link below with more detailed steps to painting with coffee.
This sentence is a link to more detailed coffee painting instructions.


Below is a video showing that you can also paint with dirt or mud!
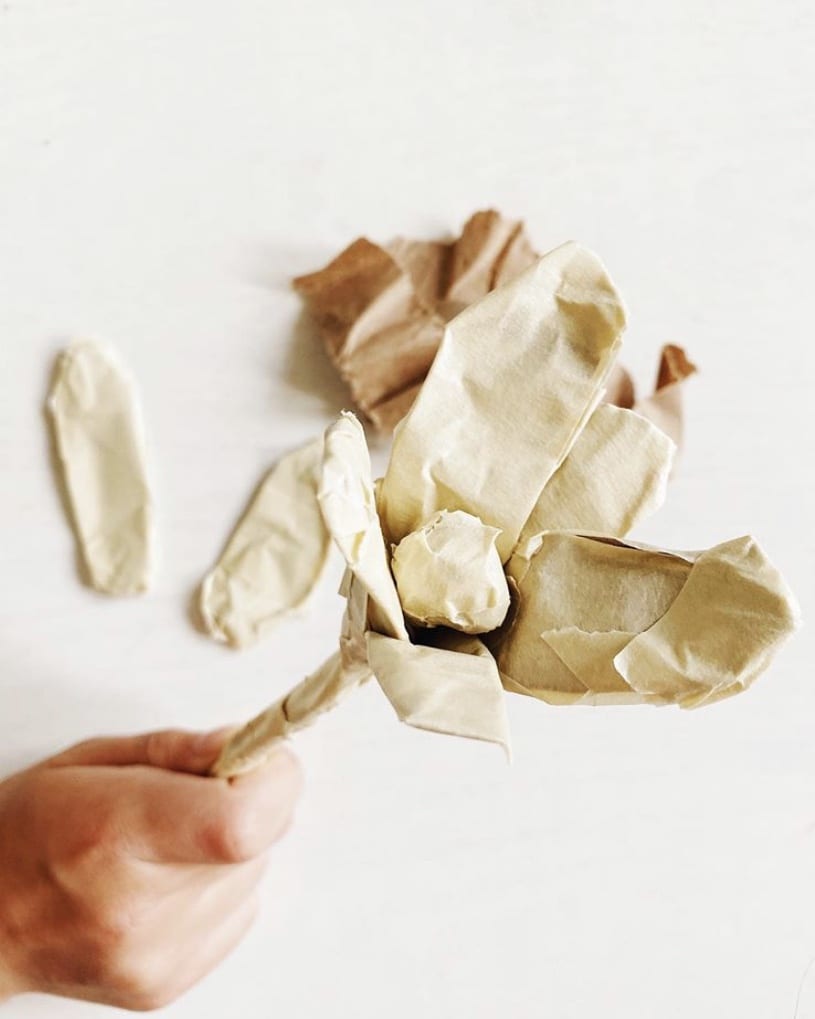
Sculptural Vase and Flowers
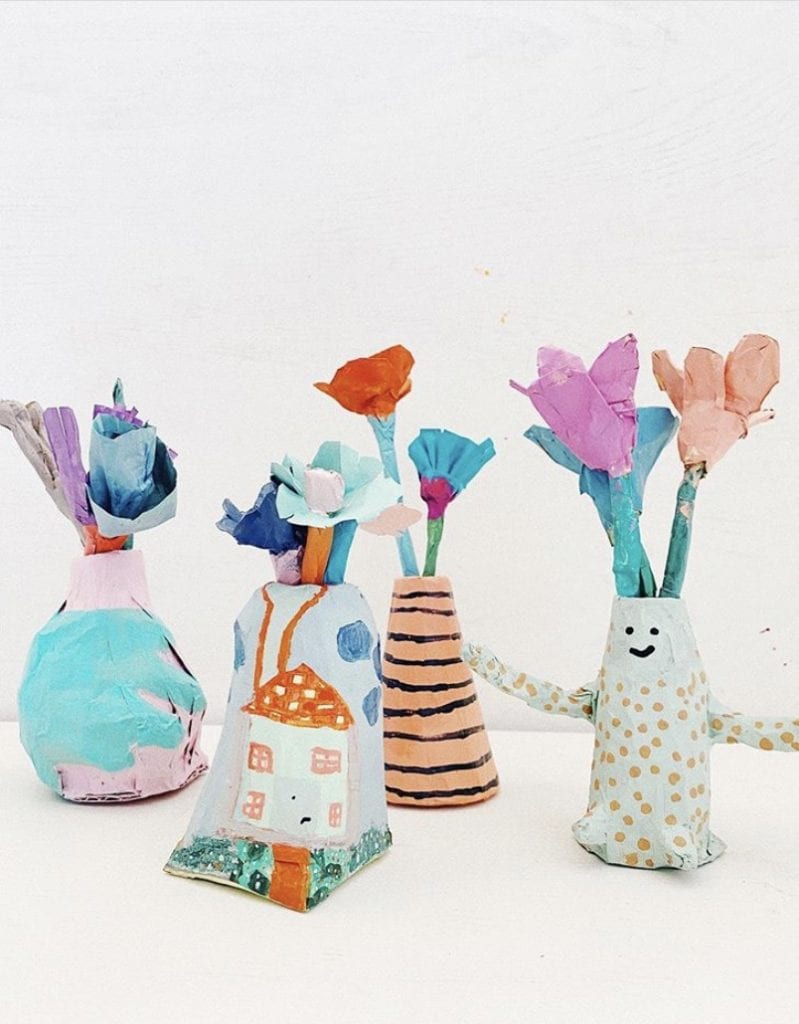
This project is similar to making a paper mache sculpture, without the paper mache paste! You will need a cardboard tube (such as a paper towel roll), masking tape, a brown paper bag (or other paper), cardboard, scissors, and paint(optional).

Cut a small piece of cardboard and tape it to the bottom of a cardboard tube. Then rip a brown paper bag (or other paper) and tape it around the tube to create a new shape. You can add tape over the whole vase sculpture when you are don so that it is more secure.


You can also create flowers with tape and paper!
If you have paint, you can paint your whole sculpture! Acrylic paint will work best on top of tape. If you do not have paint you could color with permanent markers, cover with colorful tape, or even add designs with pen!


Paper Stabiles
This project was posted by the DIA for a project you can do at home with cardstock or cardboard and scissors.
Here is a link to the full directions.