Here are some paper plate activities to work on gross motor skills! Have fun 🙂
Plate stacking: Stack paper plates on top of your child’s head. Have them stand on one leg for 10 seconds (or as long as they can) while keeping the plates on their head. Try having them walk forwards or backwards keeping the plates on their heads.
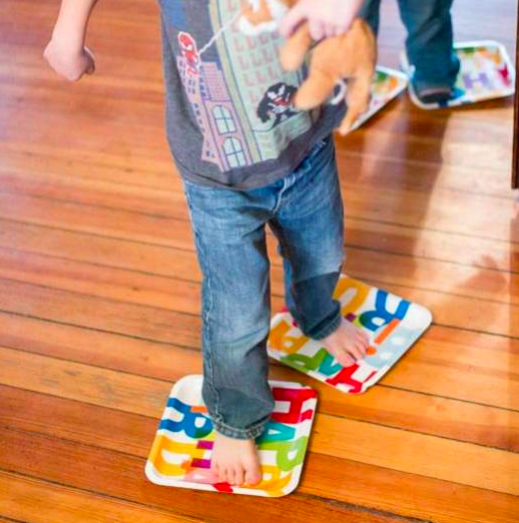
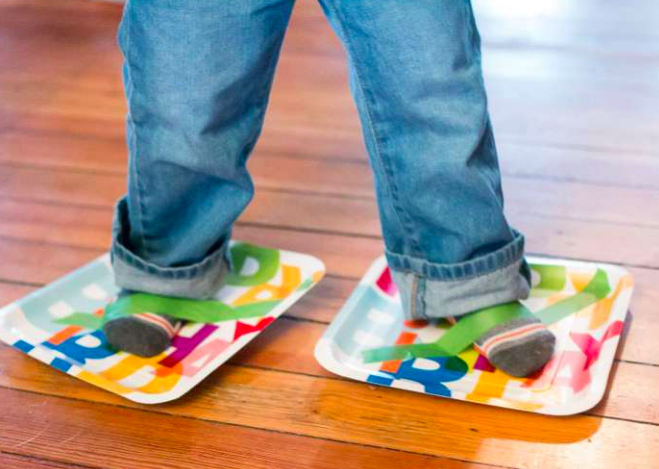
2. Plate skating: Stand on two paper plates (one under each foot). Skate like you are on ice. It works on both hardwood and carpet. It is better with bare feet but if you prefer socks, tape the plates to your feet.
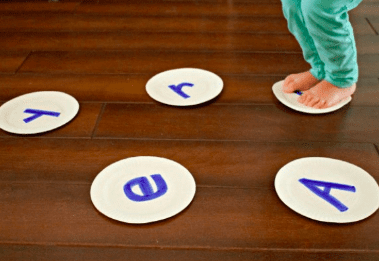
3. Name Hop: Write your child’s name across a set of plates (one letter on each plate). Place them in a line or in a scattered pattern. Have your child jump from letter to letter to spell their name. *Make sure the distance between the plates is not too far but not too close.
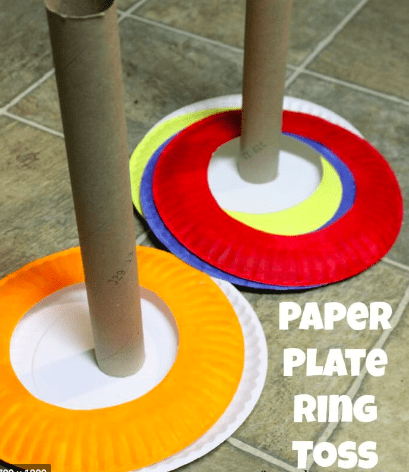
5. Ring toss: Cut a hole in the center of a few plates. Use a cylindrical household item as a post to toss the plates onto. Some examples of posts you can use:
Play dough activities can be a great source for working on fine motor skills, upper extremity strengthening, bilateral coordination, and much more! Try out these activities at home.
Play Dough Activities
1. Flatten with hands or a rolling pin – Good for shoulder/arm strengthening, bilateral coordination, and heavy work.
2. Roll into a snake or ball – Gives kids practice using two hands together, both with symmetrical hand movements (rolling with two hands together on table) and asymmetrical (alternating/opposite directions to roll a snake or ball in hands).
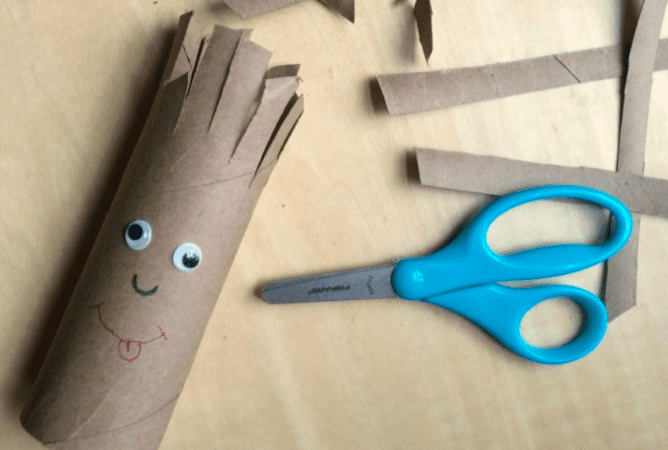
3. Decorate with accessories – Try toothpicks, Q-tips cut in half, golf tees, googly eyes, and beads to practice hand/finger strengthening and pretend play.
4. Hunt for buried treasure – Find coins or beads with eyes open or even eyes closed! Helps the tactile sensory system learn to “discriminate” between and identify different textures.
5. Use cookie cutters – Opportunity for strengthening and teaches kids about pressure and force as they cut all the way through the play dough or only partially, depending on how much force they use.
6.Cut with kid-safe utensils – Practice cutting with the side of a kid fork, as well as with a kid-safe knife. Can also cut play dough with the side of an old plastic gift card.
7. Use mini serving tongs – Helps exercise hand muscles needed for scissors and challenges hand-eye coordination. Try to make sure child is controlling tongs with fingertips as much as possible, rather than pressing tongs into palm and using whole hand. If they can do so while squeezing with their thumb, index, and middle finger (the “worker fingers”), even better.
8. Use scissors to snip a hot dog, cut a line, or cut out shapes – When snipping and cutting, encourage the “thumbs up” position (cutting hand with thumb in top loop of scissors, helper hand holding play dough with thumb on top). Start with snipping, progress to cutting forward using a few consecutive snips down a 5-inch line, then progress to cutting a 4-inch circle and square. For even more challenge, partially press a cookie cutter into the play dough, pull it out, then cut along the imprint to cut out the shape/character (e.g., heart, pumpkin, snowman).
9. Build a 3D creature – Encourages pretend play, independent thinking/problem solving, hand eye coordination, and fine motor strength/coordination. Incorporate decorations!
10. Build shapes, letters, and numbers – Help them understand the difference between big lines, little lines, big curves and little curves when rolling out the parts. When starting out, it can be helpful to write the letter on paper or mini whiteboard, then place the lines and curves right on top of it.
11. Pinch or poke along a path – After building the shape, letter, or number, pinch or poke all the way along its path for extra finger strengthening and understanding of the correct sequence and direction.
12. Write in it – Using a golf tee, toothpick, or pencil to create shapes, letters, numbers and basic drawings challenges grasp strength and provides extra sensory feedback.
BONUS: Use play dough mats – Pictures that can be printed and laminated or placed in a page protector. They encourage kids to interact with the pictures by using play dough, like giving a butterfly some wings or adding a body to caterpillar legs. Google “play dough mats.”
*****NOTE: Do not perform any of these exercises if your child complains of discomfort or pain. Every child is different and motor abilities vary. Slowly work with your child to increase their ability to complete each activity.
There is a direct relationship between activities and the stimulation children receive when they are babies and very young children and their ability to do well at school. This is supported and borne out by extensive research. It has been shown that children’s neuro physiological development is vital for their ability to read and learn.
Complete the following exercises daily for >20-30 minutes to improve:
3. Spinning both directions: Preferably slow to avoid overstimulation.
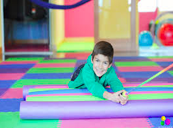
4. Tummy Time: Playing anything on tummy (if your child did not enjoy tummy time or had limited belly play before they began creeping or crawling, this milestone is a must for the beginning phases of ALL brain development)
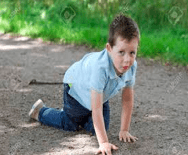
5. Creeping on belly (army crawl): Creeping on belly (army crawling). Exercise easiest on a smooth surface, while wearing comfortable clothing and with bare feet.
6. Crawling on hands and knees: This is especially important if your child had limited floor time, walked early/late or did not crawl for roughly 4 months
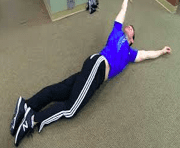
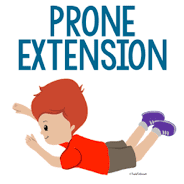
7. “Superman”: Lay on belly, straighten arms and legs, child should be able to hold for 30 seconds
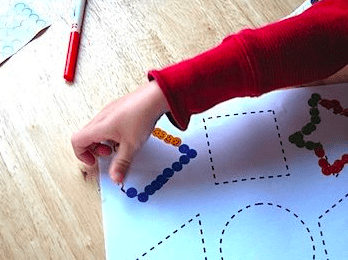
Try one or more of these clothespin activities to enhance skills such as: fine motor practice, hand strengthening, pinch strengthening, visual perception, and bilateral integration. Grade the activity to your child’s ability. Add one of following academic components. Check out the few examples below:
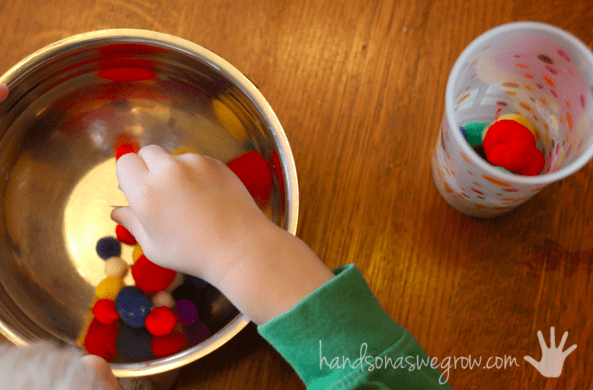
Use pom poms, cotton balls, other small items in your home.
Other ideas:
Match shapes instead of letters
Pinch clothespins onto a hanger. Put them in ABC order.
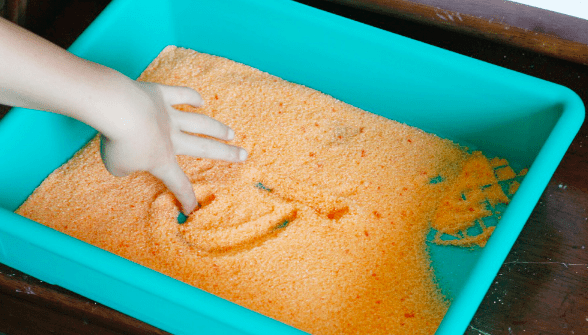
A sensory bin is an sensory tactile experience for kids. Essentially, they are containers (bins) filled with different substances for a tactile play. They help with sensory exploration through play, development of practical skills (pouring, filling, scooping), focus/attending, etc.
Sensory Bin Assembly
Container/Bin: Get creative. Use any container that is deep/large enough to allow for exploration without the contents spilling every where. Examples
Tupperware
Storage container (used for clothes or any household item)
Shoe box
Baking dish
Cardboard box
Pot
Fill with sensory materials: Stick to one material for each bin you use. Examples:
Beans
Rice
Pasta
Sand
Water
Birdseed
Oatmeal
Coffee beans
Shredded paper
Shaving cream
Aquarium rocks
Add items of interest: Make it a theme or pick random items. Examples:
Toy cars/animals/dolls
Cotton balls
Ribbons
Magnetic letters
Buttons
Pom poms
Paper clips
Gems
Shells
Stones
Add tools/instruments: Use these tools to manipulate the sensory items in the bin. This helps with exploration and fine motor skills. Examples:
Tweezers
Tongs
Spoons
Small cups
Magnifying glass
Measuring cups
Baster
Baby food jars
Ice cube tray
HAVE FUN: There is no wrong way to play with a sensory bin!
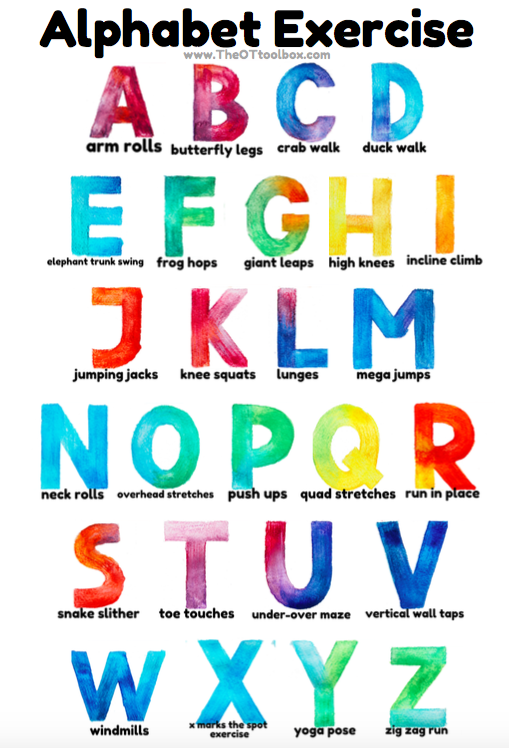
Get moving and grooving this weekend with these exercises- one for each letter of the alphabet!
Arm rolls: Move both arms in a circle at the same time. Try forwards and backwards.
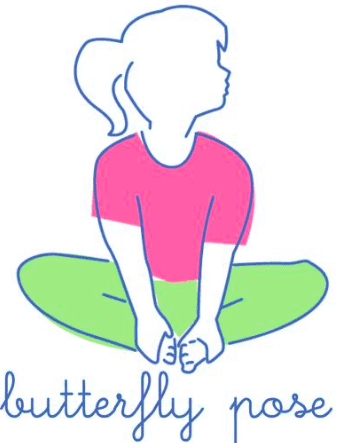
Butterfly legs: Have child sit on the floor with legs flexed and bottom of feet touching. Then have them flap their legs up and down to resemble the wings of a butterfly.
Crab walk: Have child sit on the floor, lean back on their arms and lift their body up with their legs and arms to walk along the floor resembling the walk of a crab.
Duck walk: Crouch down low to the ground and walk around the room. Bend your arms and flap them like wings.
Elephant trunk: Lean forward. Place your arms in front of you and link your hands. Swing your arms back and forth like an elephants trunk.
Frog Jump: Squat close to the ground with your hands on the floor. Jump up and down like a frog.
Giant leaps: Jump as far as possible using two feet.
High knees: March with knees alternating. Try walk around the room or in place. Reach your knees as high as possible. Try touching your knees to hands.
Incline crawl: Climb up a slide, leaning couch cushion, leaning mattress, or even the stairs.
Jumping Jacks: Have child start by standing with arms out to their sides and legs together then have them jump while spreading their legs and feet apart and arms up and over their head. Follow with bringing arms back to sides and legs and feet back together.
Knee squats: Start standing and squat using your legs to the ground. Repeat!
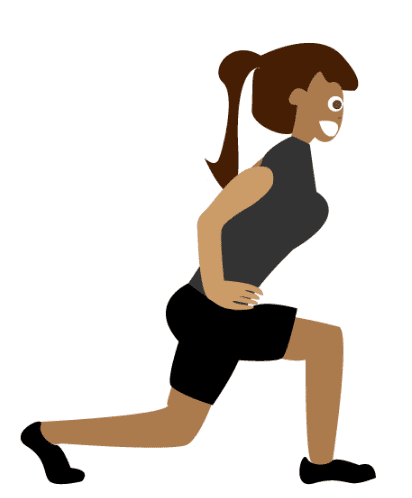
Lunges: Have child step forward with one leg and lower their hips until both knees are bent, then push back up to starting position. Alternate legs.
Mega Jumps: Have child jump from a higher level to the floor, either from a chair, sofa, steps, etc. Make sure they are being supervised and safe!
Neck rolls: Roll your neck slowly in circles (both directions). Roll your neck forward and backward. Roll your neck side to side.
Overhead stretches: Have child reach up overhead, link fingers together and stretch arms up as high as possible. Add standing on tiptoes to make it really high.
Push Ups: Lie on the floor and push yourself up with arms and hands. If its too challenging try from your knees.
Quad stretches: Have child perform, sit to stands and stand to sits, while sitting in a chair. Do this repeatedly.
Run in place: Run without moving forwards. Try to do it for 20 seconds.
Snake Slither: Have child lie on their stomach and move their body forward trying to keep as much of their body in contact with the floor as possible, similar to an army crawl.
Toe touches: Have child stand and bend over to touch their toes with their fingers and back up to standing. Do this repeatedly.
Under/over maze: Create a laser maze with string, tape, yarn, etc. Have the child move under and over through it to the other side.
Vertical Wall Taps: Have child stand beside a wall and jump to tap the wall attempting to beat their last height touched with each jump.
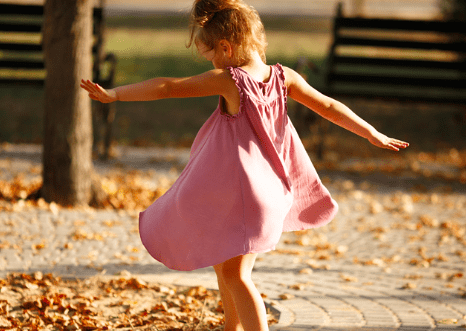
Windmills: Have child stand with arms and legs out to the sides. Have them bend over to touch right fingertips to left toes and back up to standing and then bend to touch left fingertips to right toes and back up to standing.
X-marks the spot: Cross and uncross your arms and legs while jumping.
Yoga pose: Have child pick a yoga pose to complete, such as cat pose, cobra pose, or shark pose.
Zig zag run: Use small obstacles to create a zig zag course or simply attempt to run a zig zag pattern.
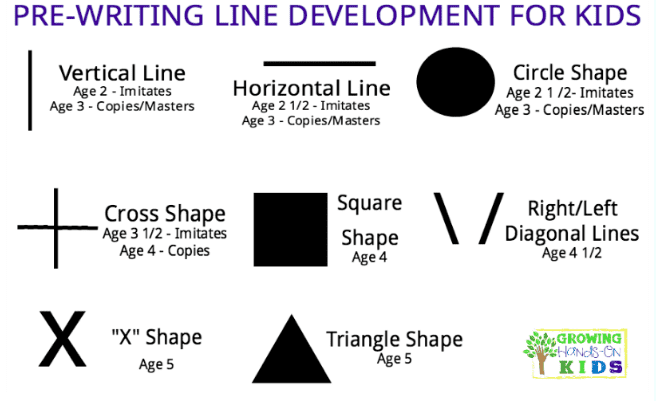
Pre-writing skills are the building blocks for efficient handwriting. Essentially, they are the lines, shapes, and strokes kids need to master before they print the alphabet. They occur in a developmental sequence based on a child’s age.
Pre-writing activity ideas:
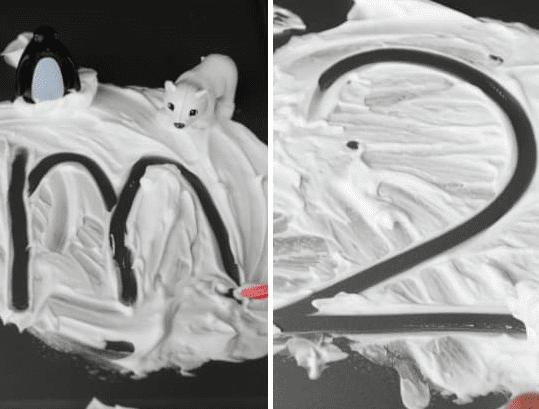
Sensory writing: Use a finger or a paint brush. Create shapes/strokes in material such as shaving cream, whipped cream, sand, rice, beans, salt, etc!
Sticker tracing: Draw pre-writing strokes on a piece of paper (lines, circle, square, triangle, cross). Have your child peel off stickers and place them on the lines.
Food writing: Use food in your house to create or trace pre-writing strokes. Examples- M&Ms, skittles, mini marshmallows, noodles. beans, blueberries, cheerios, what ever you can find!
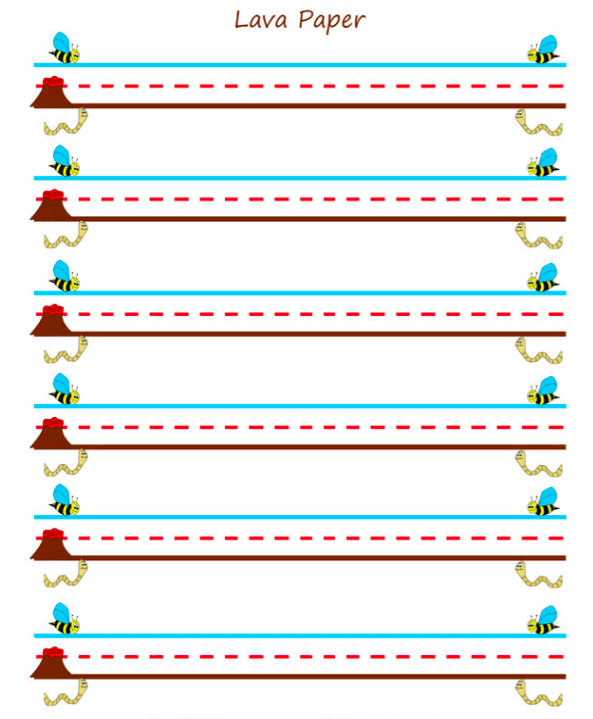
Lava Paper
Lava paper is a tool to help improve handwriting. It helps with keeping proper alignment (where the letters sit) when writing. It really needs to be printed in color at least at first. If you don’t have color printing, you can use colored pencils to print out a black and white version and then make the sky blue, brown dirt, and red lava dotted middle line.
RULES: Bees attack ANYTHING that goes above the skyline (because nothing ever should), the lava burns anyone that goes through that shouldn’t (only tall letters get to go through, all baby letters have to stay below the lava line), and worms attack if any letter goes below the dirt, except tails. Worms love tails, they especially love the swingy ones like g! They get really sad if you have a tail letter and don’t let it go under the dirt.
The good news is, if you DO make a mistake, you can save your letter right away with your eraser superpower!! Aughh!!!! Bee is coming!! Aughh!! Erase erase erase!! Oh phew you saved your letter 🙂
Brain breaks are exactly what they sound like- taking a break from what ever your child is focusing on (reading, writing, listening, learning, etc.)! Taking scheduled short breaks during work have proven to provide many benefits including:
Reducing stress/anxiety
Improving focus/attention
Can make homework less stressful
Grade Schoolers: Take a brain break every 10-15 minutes for 3-5 minutesSecondary Ed: Take a brain break every 20-30 minutes for 3-5 minutes
Brain breaks can involve physical activity or relaxation/quiet activities. Here are some brain break examples to try out:
Physical Activity
Freeze dance: Find your kids favorite songs. Stop and start the music throughout the song. When music plays, the kids dance and when music stops, the kids freeze! This gets blood pumping but keeps the movement somewhat focused so the transition back to work is less abrupt.
Rocket ship jumps: Bending down, touching toes and bouncing while counting down from 10, then blastoff!
Follow the leader: Take the lead or let your kids take the lead. Work on movement you kids needs practice with- walking backwards, jumping on two feet, jumping on one foot, balance activity, etc.