Fun Die Cut Bulletin Board Ideas

Both of these 5-6 minute videos are from the Ellison Education website:

Love the way she used photos! Simplify by doing just sand & sky since we have awesome cloud die cuts! She gets WAY too involved in making the kites – I would do this bulletin board on a slightly smaller scale, using 1/2 sheet size kids & a variety of 5″ die cuts for the kites . . . that way you can fit more staff/students on your board.

This would take a good bit of time to plan, but could be left up for quite awhile! There is also a great tip for keeping your bulletin board lettering straight . . . on any board.
Fun recycled materials

A huge advocate of the cliché idiom “Waste not, want not”, all kinds of “waste” items are saved here in the Graphics Lab! The following are available for the taking:

  1. Lots of 12″ x 24″ pieces of the extra 1 foot tail of laminate that comes out before your laminated item. Teachers use these laminate scraps as throwaway glue & paint pile holders, as a backdrop for collage (let dry & peel off), for clear “windows” on projects, etc.
  2. Lots of super sturdy 24″ long tubes – 1″ core from the laminator, 2″ core from the poster printer. Teachers use these to store posters, for science projects, as armature for sculpture & puppetry, for parade banner sign ends, etc.
  3. Boxes and boxes of confetti – rectangles from the Cerlox punch machine, circles from the 3-hole punch on the copy machines. Confetti is not a friend of school custodians, however, when kept contained it has some good uses – such as hiding small items in a large box of confetti to help develop fine motor skills!


Stop by the Graphics Lab anytime to check out and/or pick up these freebie items!

Copy Paper Care

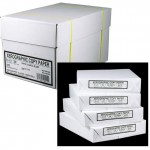
boise paperThere is an art to caring for the paper that goes into copy machines. Paper needs to be stored in the wrapper AND in the paper box for as long as possible.  Leaving paper sitting around unwrapped or unboxed causes it to absorb moisture very quickly – resulting in jamming throughout the copy machine.  Always store paper flat, NEVER store a ream of paper on its side or it will have a permanent curl!!

Most people don’t realize that sheets of copy paper actually have a top and a bottom.  Place the ream of paper on a table with the seam side of the wrapper facing up and unwrap the paper. Now, keeping the seam side of the paper stack face up, put the paper into the copier paper drawer.  This especially makes a difference when copying 2-sided material – by loading the paper with the correct side up, you will avoid jamming the copier.

If you are having a lot of copier jams, try flipping the paper over OR try replacing the paper with fresh paper . . . before you call the copier repairman!


Laminating items wider than 25″

laminatorSo you want to laminate something that is wider than the 25″ laminator??  All you have to do is fold the item in half and run it through the laminator.  When you trim it right to the edges, the item will “pop apart”.  Then, if you want the back side laminated, you fold the item in half again – but with the previous laminate back-to-back.  When you trim right to the edges, the item will “pop apart” again!  For edges that don’t come apart, use an X-Acto knife and gently cut just the laminate (not the item).  Also, be careful trimming the folded edge – you could end up with a “fisheye” hole.

The only down side to this method is that you will have a permanent fold seam down the middle of your item, so you won’t want to do this with “good” posters – but for maps or parade banners this is a great solution!

If you are a “hands on” learner or need a project laminated like this, just drop by the Graphics Lab . . . both laminators are always on!