I am posting each grade once per week. You have a week to do your art work and submit it to me through email. Please include your first and last name and the name of your teacher!!!
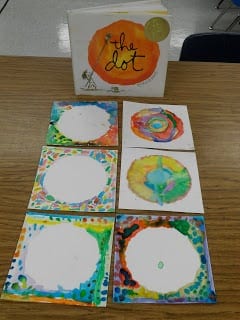
Watch the video of the book, The Dot, by Peter H. Reynolds.
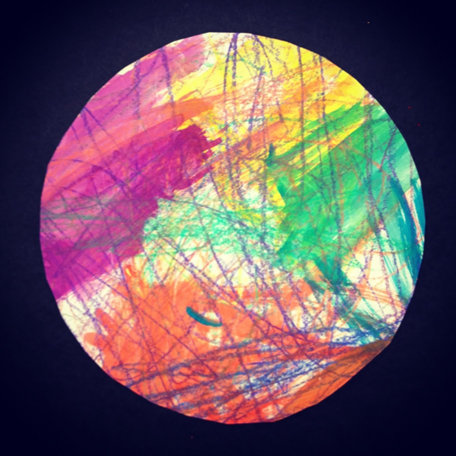
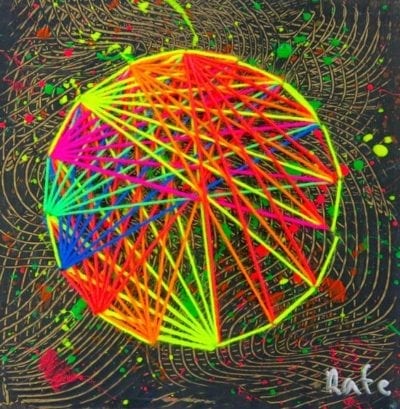
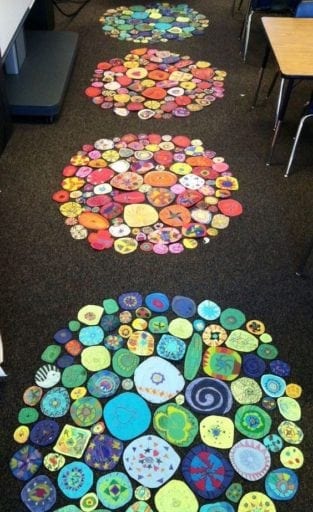
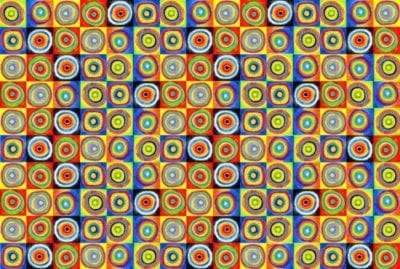
Let’s all make some dots!!! Use whatever you have at home- white paper, colored paper, paper plates, newspaper….use crayons, colored pencils, markers, paints…add yarn, tissue paper….anything! make a LOT of dots and share. Put all your dots together to create something- what will it be?????
Crayons and paint
paint, scratching and yarn
Painted and designed paper platesA “not” dot…
Designed in hot or cold colors
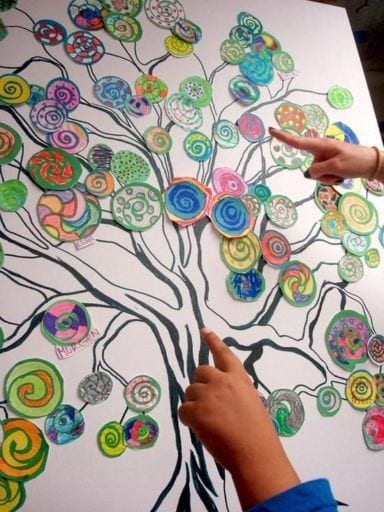
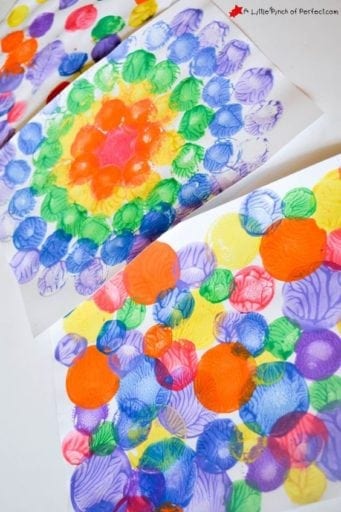
A whole lot of dots!!!!Dots used as leaves on a tree in a picture…Printed dots with bottle tops and paint…..
A cool design using lots of dots!
What did you come up with? Send me a t picture of what you created! zecharj@dearbornschools.org Include your first and last name and the name of your teacher so I can give you credit!
I hope you had fun making DOTS!!!! As always- do all of your school work, get outside for some fresh air, be helpful at home and Be Kind!!!!
I am posting each grade once per week. You have a week to do your art work and submit it to me through email. Please include your first and last name and the name of your teacher!!!
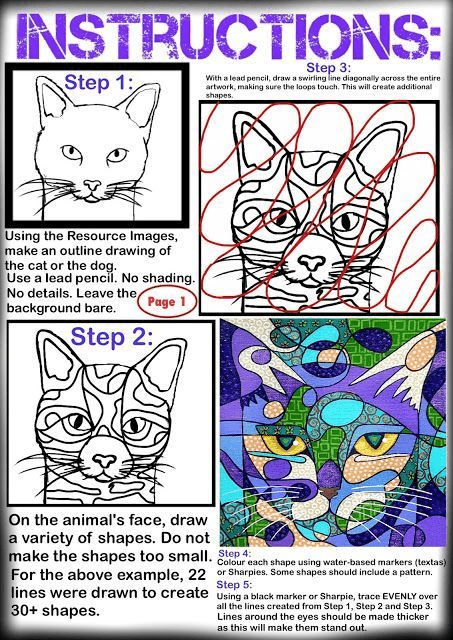
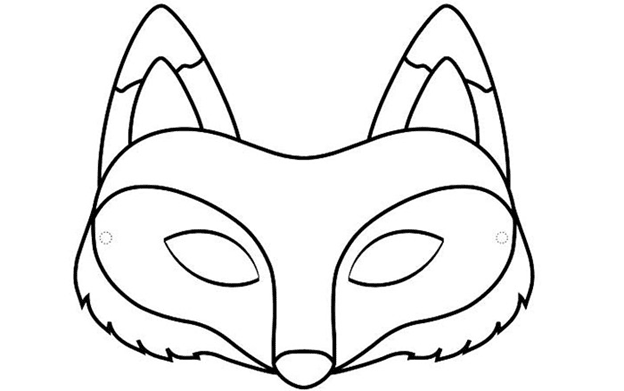
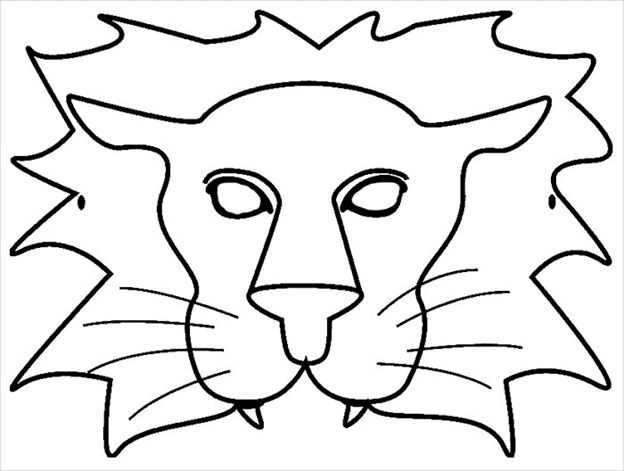
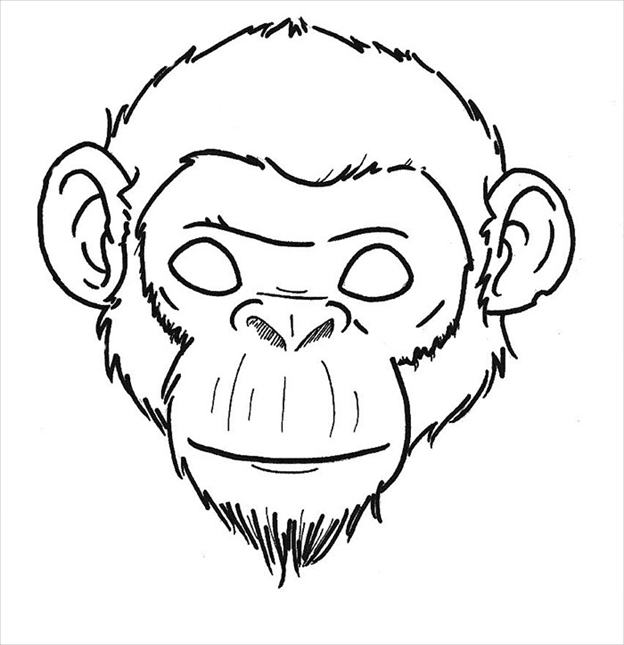
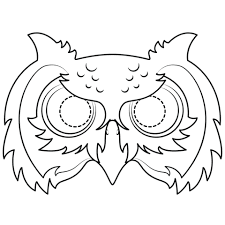
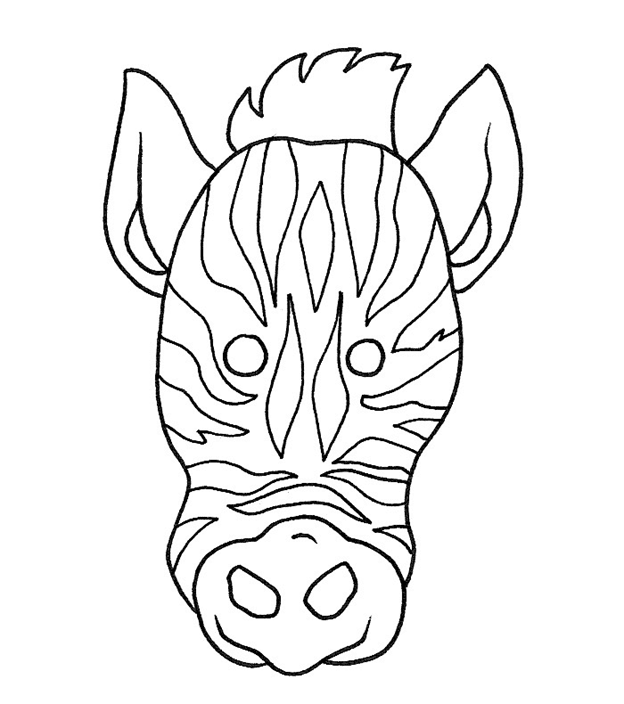
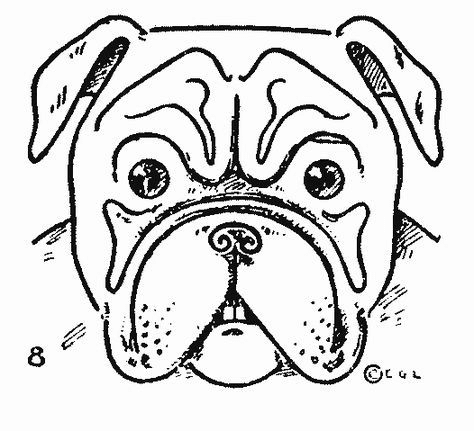
You can use any animal, here are some black line animal ideas…..you can copy these, use them as inspiration or totally draw your own!
When it comes time to add color- use what you have- markers, colored pencils, crayons, watercolor paint- your choice! Please take a picture and send it to my email so I can give you credit, remember: new 5th grade art assignments each Friday! zecharj@dearbornschools.org
As always, please do all of your school work, get outside for fresh air, be helpful at home and Be Kind!
I am posting each grade once per week. You have a week to do your art work and submit it to me through email. Please include your first and last name and the name of your teacher!!!
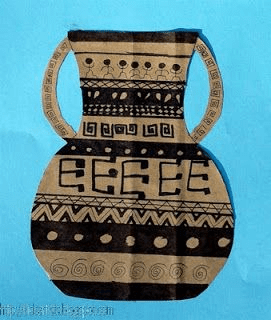
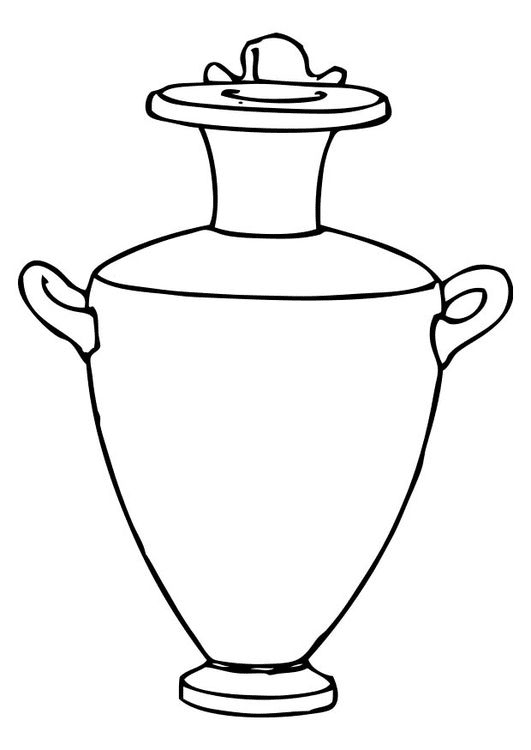
Greek and Roman cultures used pottery to commemorate events, they made special vases/vessels for ceremonies and celebrations. They were made out of clay and carried designs that reflected what the special occasion was, who the family was and they often had images that told the time period and region.
You can use white paper, or any paper BUT if you have a paper bag- that would work great. You would already have that brownish color for the background. Don’t worry if you don’t have Sharpies- any black marker, or a black crayon or colored pencil will be a great substitute. If you used a bag, you are all set with the background color. If you used paper you can color it.
Watch for a demonstration…..
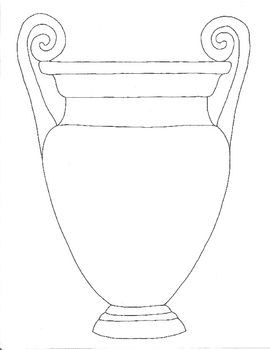
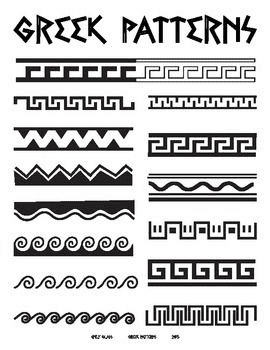
So there are a few vase/vessel shapes you can look at for inspiration or to copy. I have included a pattern design example sheet for you to look at. You could use these in the top and bottom border, and/or in the frame you make for your picture.
For the picture- make it personal like the Greek and Romans would have. Show yourself doing something with your family, celebrating an event or a family portrait. Make it special to YOU! The design on these vessels was usually black, but you do it in color if you want to.
Please share this with me through my email and include your first and last name and the name of your teacher so I can give you credit. If you want to hold it in the picture I would get to see your smile and that would make ME happy!!!
I am posting each grade once per week. You have a week to do your art work and submit it to me through email. Please include your first and last name and the name of your teacher!!!
Watch the instructional video first……Don’t worry about having the same materials as the video- use what you have on hand. Crayons will work for color, if you have markers but not a paintbrush- you can wrap a piece of paper towel around your finger and dip that in water as a brush. You’ll need to keep replacing it, but it works!!!!
Send me a photo of your art work, include you first and last name and the name of your teacher. Maybe you could hold your artwork in the picture so I can see you!!!!
As always, do you school work, get some fresh air every day, be helpful to your family and in the house and Be Kind!
I am posting each grade once per week. You have a week to do your art work and submit it to me through email. Please include your first and last name and the name of your teacher!!!
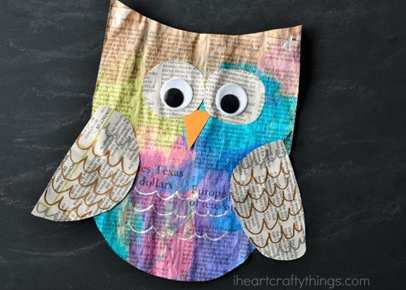
You can use any kind of paper you have- newspaper, wrapping paper, colored paper, white paper……we need to start by cutting out a LARGE oval to make the body. At one end of the oval cut a low dip to show the ears of the owl. Now out of the rest of your paper cut two smaller ovals which will be the wings. You can leave them the way they are or cut a straight edge on one side of each. Cut two circles that will be the eyes, one smallish triangle for the beak and we are ready to add color! The example was painted with watercolors but you can use anything- chalk, marker, crayon, colored pencils….. Have fun and be creative with your color- YOU can make it any color(s) that you want! Add detail on the wing and chest area to make it look like feathers, and add an eyeball to each circle. Glue this all together and you have your OWL! You could make lots of them in different sizes and turn them into a picture if you want to! Don’t forget to send me a picture. Maybe you could hold it so I could see your smile, too!
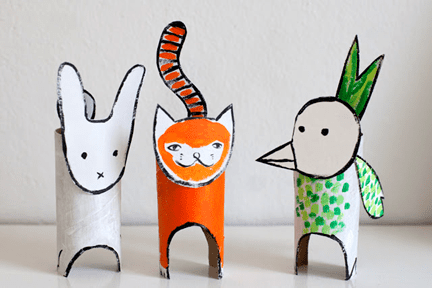
You will need some toilet paper tubes, or paper towel tubes or you can make your own cylinder by cutting a rectangle, rolling the long sides into a tube and gluing or taping it shut.
Next: decide what to make. You can make any kind of animal by cutting and adding features. You can color right onto the cardboard tubes, you might want to color the tubes you make first before rolling them into shape as they won’t be as strong as the toilet paper tubes. Have fun, create a zoo, make dinosaurs, or a forest, or make up your own animals. The sky is the limit!!!!
Looks life tons of fun!!!! You can make lots and then create a puppet show for your family!
Make sure you send me a photo- I would love to see you holding your creations so I can see your smiles!!!!
I am posting each grade once per week. You have a week to do your art work and submit it to me through email. Please include your first and last name and the name of your teacher!!!
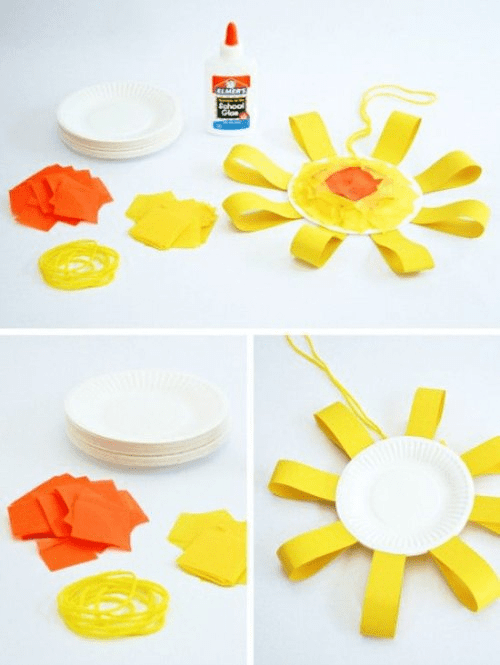
It was a BEAUTIFUL weekend so let’s celebrate the sunshine. You will need a circle- could be a paper plate or a circle of any paper you have on hand. You will need colored paper- mostly yellow- BUT if you don’t have colored paper you can make it yourself by coloring paper yellow, orange, red if you want! You want to cut your colored paper into squares to glue into the circle to make the center of the sun. You could do red in the center, outlined by orange and then outlined by yellow, or you could do just one color if you prefer. Also cut some rectangular strips that you can bend in half to glue on the edges of your circle to make the rays. Again, these can be different colors or all one- your choice. If you have yarn or string you can add a piece of it to hang up your sun. For even more fun- add a face- you can draw right on the center of the sun or cut out and glue on some eyes, a nose and a mouth- maybe sunglasses?
Watch the video on making a paper plate snail. You will need a paper plate- or a paper circle will work. You will also need colored paper to cut into squares for decorations on it’s back and to make a head and neck. If you don’t have colored paper you can just color a white piece with crayons or markers and cut those up. Glue your snail together and display it. Use colors that are your favorites to make it fun for you!
Please submit your art work to my email so that I can give you credit. You have a week to do this!!
Hi, everyone…I made a daily schedule of when I will be posting art assignments. I know you have a lot on your plate so I thought this might help! The students have a whole week to do their assignment, it is due by the next time I post for the grade- which means 7 days. Please let me know what they did or send a photo through dojo or my email (include the teacher name so I know which class):
Let’s learn a bit about an artist love and he draws and paints things we ALL love!
Wayne Thiebaud:
Born November 15, 1920, Mesa, Arizona, U.S.
He is American painter and printmaker who is well-known for his colorful paintings depicting commonplace “production line” objects and items on display: pies, lipsticks, paint cans, ice cream cones, pastries, and hot dogs. He also painted landscapes and figures.
Thiebaud uses thick paint and exaggerated colors to depict his subjects, and the well-defined shadows characteristic of advertisements are almost always included in his work.
“You take a lemon meringue pie. It’s quite a beautiful thing…It’s more than just a subject, it’s also a kind of relationship to the paint itself. You really feel like you’re sort of making the meringue and…working with the pie.” Wayne Thiebaud.
One summer during his high school years he apprenticed at Walt Disney Studios drawing “in-betweens” of Goofy, Pinocchio, and Jiminy Cricket at a rate of $14 a week.
Thiebaud studied Commercial Art in school.
He tried cartooning and commercial art, but eventually his passion for painting and art history led him back to school to study art education and studio art. In 1951, Thiebaud began a dual career as an art teacher and an artist in Sacramento, California.
Wayne Thiebaud is often incorrectly associated with American Pop Art because of his many images of “everyday” and mass culture objects. However, his artwork executed during the fifties and sixties, slightly pre-dates the works of the classic pop artists, suggesting that Thiebaud may have had an influence on the movement because of his images and use of color.
Use a plastic cup to draw the lollipops. Draw the front first by tracing the cup completely. Then slide the cup slightly to the right and draw the “side” of the lollipop.
Lay a popsicle stick or ruler under the lollipop to draw the stick (draw a curved line at the bottom of the stick.
Add a half circle shape as a holder for them and make it look three dimensional, like the lollipops, by adding a back edge.
Now add interesting patterns to each sucker and color! Make them colorful, interesting and tasty looking. Don’t forget to add a surface, like a table, for them so sit on and color that and the background.
I think this will be fun and I look forward to the images you send. Add color with whatever you have at home- marker, crayon, colored pencil, paint, oil crayon…… Please send me a picture of what you make so I can give you credit! When you send it through my email please add your teacher name so I know which class to grade you in.
As always, make sure you are doing all of your schoolwork, get outside for fresh air- they are predicting a beautiful weekend, be helpful at home and Be Kind!