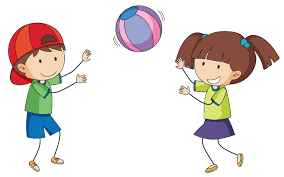
I use balls all the time during OT sessions and it is a “tool” that I don’t want to overlook! They are used to increase fine motor, gross motor, attention, strength, endurance, etc. We use a variety of sizes depending on the purpose for the individual session. Larger therapy balls help to work on balance reactions and postural control as well as providing vestibular input in a variety of directions. Students may sit on a therapy ball to increase attention, posture during activities, and to provide necessary sensory feedback. Smaller balls are also used in a variety of ways during more of a “play-based” therapy session and here are a number of things I could be focusing on:

  1. Visual attention to the ball
  2. Maintaining a stable base of support while reaching for the ball
  3. Rotating the trunk
  4. Grasping the ball
  5. Flexing/Extending the wrist, elbow and shoulder
  6. Maintaining attention to the task
  7. Demonstrate visual motor coordination to hit a target
  8. Bilateral Coordination

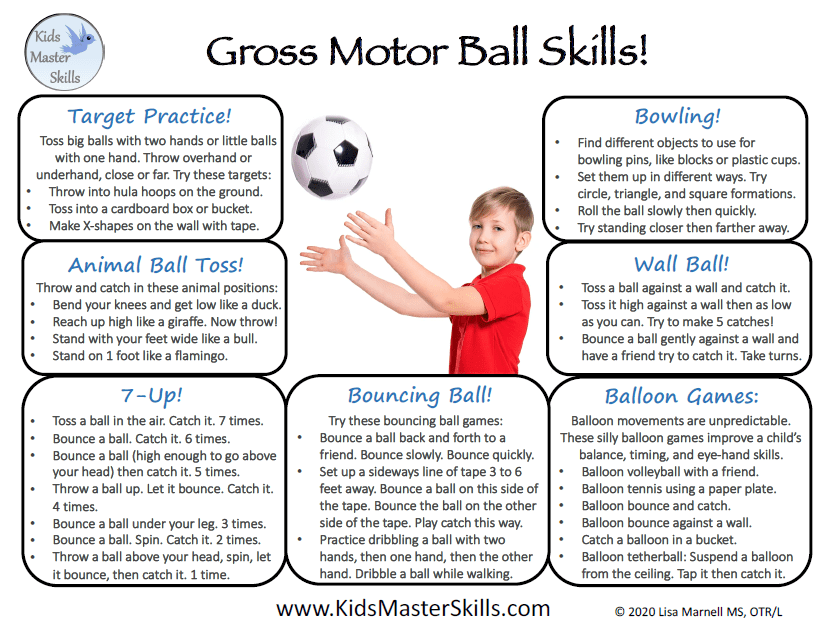
Today, the Tools Tuesday highlights are brought to you from Lisa Marnell, OTRL from Kids Master Skills. Below are a number of activities you can do with your child using a ball and having fun! Download a copy for your convenience!

As we start to get outside more with the weather getting nicer and the stay-at-home orders being lifted, I have a fun activity to share for Movement Monday. It was shared by one of the district’s GSRP teachers and instantly thought it was a great activity to post on my blog. Please check out the Construction Sign Fitness and have some fun with your child! For every sign they see, they do the movement activity that corresponds to the sign.

Welcome to the 8th edition of OT Friday Fun Fine Motor Newsletter! Let’s make a wind chime! In order to access all the links below, download the newsletter and click on the links.

Without a Printer:
• Measure each piece of paper based upon the measurements listed in the video link.
• Use the designated materials to make a wind chime while following the instructions on your screen.

Where to Place Your Chime:
• Outside the front door
• In the back yard
• In the kitchen above the table
• In your child’s room by the window
• Anywhere else!

Ways to Incorporate Handwriting:
• Have your child write their name on each shape on the wind chime.
• Using lined paper, have your child write about where they want to hang their wind chime.
• Have your child copy a few of the sentences from the instructions on how to make the wind chime.
• Copy the words for all of the colors your child sees when they look at the wind chime.
• Have your child write a summary pertaining to the history of wind chimes.


Christie Burnett is an early childhood teacher, presenter, writer and the editor of Childhood 101. She has some great resources on her blog and one specifically I wanted to share with you focuses on managing emotions and mindfulness. Today, for Thinking Thursday I want to introduce you to Take 5 Breathing. Take 5 Breathing is a great way for your child to slow and deepen their breath, slow down the heart rate, provide sensory feedback to the brain and allow them to refocus. Your child will concentrate on taking five slow breaths in through their nose and out through their mouth. Use the following as a guide to teach your child the steps to Take 5 Breathing.

  1. Spread one hand out like a star.
  2. Use the index finger on your other hand to trace the outline of your star hand.
  3. Take a deep breath in as you move to the top of your thumb.
  4. Breathe out as you move down between your thumb and first finger.
  5. Take another breath in as you move to the top of your first finger.
  6. Breathe out as you move down between your first and second finger.
  7. Repeat until you have taken five slow, deep breaths.

https://childhood101.com/take-5-breathing-exercise/?fbclid=IwAR2dHNgcVGap0NJoauVFLIV5uCsOsSgUQtxQ747aoPtuzP3hbpNzP98MNRI

For the last two Writing Wednesdays, we focused on capital letters, as they are generally easier to form compared to their lowercase counterparts. Today, I want to share with you a resource created by a fellow OT who made videos of teaching the lowercase letters with paper and pencil, using the Handwriting Without Tears program. The videos are listed in developmental order of how they should be taught. In addition, the program teaches the letters in groups in which they have common starting points. Since the capital letters are the first to be taught with Handwriting Without Tears, the capital letters are teaching order 1-26. The lowercase letters have a teaching order of 27-52, since they are taught after the capital letters.

Lowercase Letters (Writing with Pencil and Paper)

Video LinkHWT Teaching Order
chttps://youtu.be/kDHnBiij6eg27
ohttps://youtu.be/itl2NoZoD_M28
shttps://youtu.be/sAd_GHLn8aU29
vhttp://youtu.be/Ebrncob1SFg30
whttp://youtu.be/fH4iDVkijHk31
thttp://youtu.be/aDLBPM-x64w32
ahttps://youtu.be/bMXAeFukjus33
dhttps://youtu.be/ePmu-HMO_Tg34
ghttps://youtu.be/mfFzkTYyWGA35
uhttp://youtu.be/og3X1r3mKhI36
ihttp://youtu.be/EpnwVo4gmEQ37
ehttp://youtu.be/aSy7nw4qWik38
lhttp://youtu.be/_64TFwpaqkg39
khttp://youtu.be/eZJBPx9AzsU40
yhttps://youtu.be/b6G8oSCjpWY41
jhttps://youtu.be/wlQidZEKT2A42
phttps://youtu.be/aRLNJiM2Uc043
rhttps://youtu.be/PcXPmh1lerw44
nhttps://youtu.be/72e6jnMjWps45
mhttps://youtu.be/UStef0L8VV446
hhttps://youtu.be/2hRTvioNRaA47
bhttps://youtu.be/0uAGt1Z17IU48
fhttp://youtu.be/HE9QwnqnSGo49
qhttps://youtu.be/vazF8q7yBtc50
xhttp://youtu.be/tqRVOGE8Sfk51
zhttp://youtu.be/wk-R_D0QMhE52

I thought for Tools Tuesday it would be great to use one of my favorites that I love to use in OT…PAINT!!! Painting is an awesome sensory experience for children! It allows for a huge range of creativity and artistry, and most kids love to paint!! Here are three easy recipes I found on Facebook by MotherCould to explore with your child!

It’s suppose to be a beautiful day, so how about getting outside for a scavenger hunt for Movement Monday! Below is a Nature Scavenger Hunt which could be a lot of fun to do with your child. Enjoy the weather and have a great time!

It’s time for the 7th edition of OT Friday Fun Fine Motor Newsletter! This week we are going to make fidgets. Fidgets are great tools to help increase focus, attention, calming and active listening. They are not a “one size fits all” type of tool as different types of fidgets can meet different sensory needs. Fidgets come in all different shapes, sizes, and textures and it is important to explore different options to see what works best for your child if a fidget is recommended.

How to Use Fidgets:
• Take out your fidget when you need to focus on something to help you calm down, such as after having an anxious thought or getting into a disagreement with a sibling.
• Use your fidget to help you focus while studying or listening to a book being read to you by your teacher.
• Have your fidget during times you need to increase alertness, such as when you feel bored. However, don’t let it become a distraction to yourself or others.

Ways to Incorporate Handwriting:
• Have your child write or copy the names of the different fidgets listed in this newsletter.
• Copy sentences about what your child would like to do with their fidgets.
• Write a list about when it is appropriate to use a fidget and when it is inappropriate.
• Make a list of written “fidget rules” to use at home.

Let’s have some fun by cracking the code! It is a great way to use critical thinking and visual perceptual skills while having fun. Use the key to help figure out the inspirational quote.

As I stated last week, when teaching or remediating handwriting skills, I use Handwriting Without Tears (HWT). I have been using the program for 15 years to help students increase letter/number memory, formation, proper orientation, placement on the line, spacing between letters/words, and motor control. It uses a multi-sensory approach and it teaches/remediates skills in a developmental order. So with this program, it starts with all capital letters followed by lowercase letters. Capital letters are generally easier to form compared to its counterpart, lowercase letters. In addition, the program teaches the letters in groups in which they have common starting points. Last week we used the wet-dry-try technique using a chalkboard and chalk. Today, I want to share with you a resource created by a fellow OT who made videos of teaching the capital letters with paper and pencil. The videos are listed in developmental order of how they should be taught.

Pencils to Keyboards: Teaching Your Students to Write Today

Letters (Writing with Pencil and Paper)

Video LinkHWT Teaching Order
Fhttp://youtu.be/mmqbTqD9fDA1
Ehttp://youtu.be/2hKpH98p6bc2
Dhttp://youtu.be/JzpnBtPiiQI3
Phttp://youtu.be/tUcgQcFn5Do4
Bhttp://youtu.be/kbh4NwGvJy45
Rhttp://youtu.be/EXyU10UK46c6
Nhttp://youtu.be/PD4KqlKibTs7
Mhttp://youtu.be/LBQ9NjECMKw8
Hhttp://youtu.be/qQSzCsyUsgM9
Khttp://youtu.be/MGL3_RTkeoI10
Lhttp://youtu.be/ufO7nNNcB9c11
Uhttp://youtu.be/m1J1tHi1bLs12
Vhttp://youtu.be/eEr7-DPEzPg13
Whttp://youtu.be/iT28lTOEaYs14
Xhttp://youtu.be/vEb0A8aWJOY15
Yhttp://youtu.be/345GdMm7CDQ16
Zhttp://youtu.be/8oN8JDBCiMk17
Chttp://youtu.be/omg8o0WC9Lo18
Ohttp://youtu.be/x6xJqUA-k6k19
Qhttp://youtu.be/V5ltVERwpMo20
Ghttp://youtu.be/nk_Y_XsJ9Nw21
Shttp://youtu.be/tCxzCZVJo2A22
Ahttp://youtu.be/pUL4bSek3F423
Ihttp://youtu.be/7JPg58QRECY24
Thttp://youtu.be/iQubT6Py2Hg25
Jhttp://youtu.be/R_Ka77dCw5w26