Archive for the ‘Blogs’ Category

Today, Tools Tuesday, is going to use simple disposable cups for our activities. In the attached video, OTs “pass the cup” in a series of creative ways to use plastic and paper cups for several fun tasks. From simple crafts to ping pong ball basketball and word games, there is a lot of creativity and something for a variety of ages. Therapy doesn’t have to be expensive and it’s always nice when we can use “tools” from our own home. https://www.facebook.com/freshinyourmind.ot/videos/559695484982793/

Here are a few activities you can do with your child:
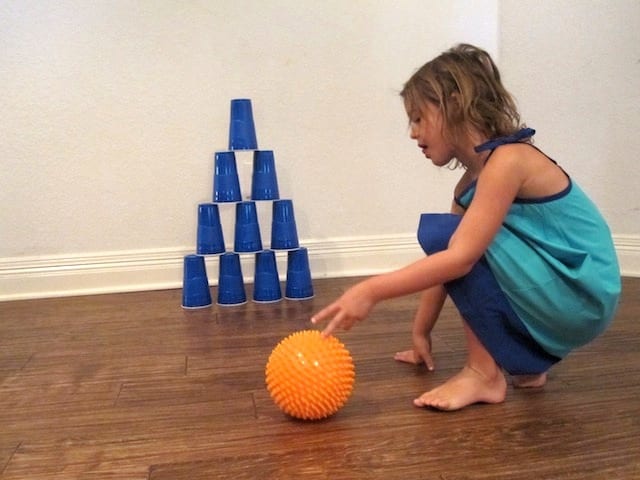
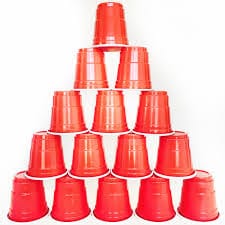
• Cup Stacking – Cups can be piled in pyramids of all sizes and shapes or made into walls or towers. Your child can practice math if they count their stacks or create patterns with different colored cups.
• Bowling – Set up a mini bowling alley by using overturned plastic cups as pins. Use the traditional triangle setup or create a stacked pyramid. Then roll a small ball to knock them down. You can also stack the cups in a vertical design for an alternate method.
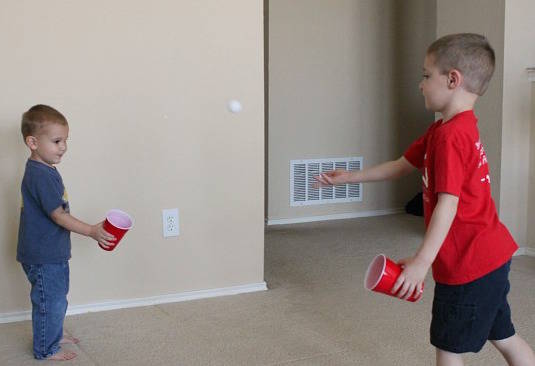
• Play Catch – Use plastic cups as both throwers and catchers as you toss a ping pong ball or small pompom. What’s great about this is it works for individual play (toss the ball up in the air, then catch with the same cup), in pairs, or in a small group.

Stock Photo by Sean Locke www.digitalplanetdesign.com

It’s time for the 6th edition of OT Friday Fun Fine Motor Newsletter. It’s time to have fun using coins! You will need an assortment of coins for these activities. There are multiple activities listed and you can decide which one(s) would be most appropriate for your child.

Don’t have a Printer:
• Have your child stack the coins as high as they can.
• Sort coins into piles according to their worth.
• Place coins in a stack to make a certain amount, such as $1.89.
• Create patterns with coins and have your child copy them.

Ways to Incorporate Handwriting:
• Have your child write their name on each worksheet.
• Cut out the piggy banks and have your child write their name on the back of each bank.
• Write sentences about what your child would do with a piggy bank full of coins.
• Copy sentences about castles or racing after finishing the corresponding fine motor activity.

My son and daughter used to love playing with Legos when they were younger. I really thought my daughter would go into engineering as she was always building creative Lego structures starting at a very young age. As she got older, she loved to build the intricate designs by the instructions and the more pieces, the better.

Today, I would like to challenge your child to construct a Lego bridge or multiple bridges as part of our Thinking Thursday task. This activity sounds very simple, but it uses a lot of different skills. In addition to the obvious fine motor skills needed to manipulate the Legos, it also takes critical thinking and reasoning skills to plan how long, how sturdy, and what types of Legos are needed to build a functional bridge. First, draw a picture of a river on a piece of paper, cardboard, poster board, etc.

Draw a River

Next, construct various bridges using different rectangular and flat bricks that stretch the width of the river. Make sure your bridge can stand up by itself and possibly withstand a small amount of weight, such as Lego people or small figurines. Lastly, continue to have fun with imaginary play as this is great entertainment while shaping the minds and hands of our kids!

When teaching or remediating handwriting skills, I use Handwriting Without Tears (HWT). I have been using the program for 15 years to help students increase letter/number memory, formation, proper orientation, placement on the line, spacing between letters/words, and motor control. It uses a multi-sensory approach and it teaches/remediates skills in a developmental order. So with this program it starts with all capital letters followed by lowercase letters. Capital letters are generally easier to form compared to its counterpart, lowercase letters. In addition, the program teaches the letters in groups in which they have common starting points. Today, I want to share with you a resource created by a fellow OT who made videos of teaching the capital letters using the Wet-Dry-Try method. This activity utilizes chalk, chalkboard and a wet sponge. The purpose is to teach and reinforce letter formation. It is the next step in practicing the concepts of writing “Big Line, Little Line, Big Curve, Little Curve” verbal cues for letter formation. It is used for writers with beginning level skills, or to reinforce skills in more experienced writers. This helps students practice correct pencil grasp while using the small chalk pieces, it also helps them practice writing straight lines with the assistance of the edge of the chalkboard. If you are interested in learning more about the Wet-Dry-Try method or an alternate method using an app, visit https://www.lwtears.com/blog/wet-dry-try-showdown-activity-vs-app.

Wet-Dry-Try
VideoLink
Fhttps://youtu.be/s9oZv9W7NMU?list=PL6ECE105040CFCCC5
Ehttps://youtu.be/zRuPRZizHSQ?list=PL6ECE105040CFCCC5
Dhttps://youtu.be/AfXoTCzSkM4?list=PL6ECE105040CFCCC5
Phttps://youtu.be/F136KvLkXIw?list=PL6ECE105040CFCCC5
Bhttps://youtu.be/iU6gWbBl1PU?list=PL6ECE105040CFCCC5
Rhttps://youtu.be/ZkU2cuEx4CY?list=PL6ECE105040CFCCC5
Nhttps://youtu.be/SFBe7lbLFdA?list=PL6ECE105040CFCCC5
Mhttps://youtu.be/bB47yo3wqFY?list=PL6ECE105040CFCCC5
Hhttps://youtu.be/xbC9YfZIzns?list=PL6ECE105040CFCCC5
Khttps://youtu.be/Npvv1ZIzttU?list=PL6ECE105040CFCCC5
Lhttps://youtu.be/TYS51nvioz8?list=PL6ECE105040CFCCC5
Uhttps://youtu.be/lwjYWRMdyJQ?list=PL6ECE105040CFCCC5
Vhttps://youtu.be/EKUpFOntAa8?list=PL6ECE105040CFCCC5
Whttps://youtu.be/KlsjcgWiDlo?list=PL6ECE105040CFCCC5
Xhttps://youtu.be/FkEraQmGm1o?list=PL6ECE105040CFCCC5
Yhttps://youtu.be/Fg_pTbZdyBo?list=PL6ECE105040CFCCC5
Zhttps://youtu.be/F6Hs0MonASQ?list=PL6ECE105040CFCCC5
Chttps://youtu.be/DewCVcCCcUo?list=PL6ECE105040CFCCC5
Ohttps://youtu.be/HtAVb5zcHpQ?list=PL6ECE105040CFCCC5
Qhttps://youtu.be/bsJ9mpBj2yY?list=PL6ECE105040CFCCC5
Ghttps://youtu.be/vMwEWPwQ-iU?list=PL6ECE105040CFCCC5
Shttps://youtu.be/27kfvUzvmYM?list=PL6ECE105040CFCCC5
Ahttps://youtu.be/G4TCYm3Dgiw?list=PL6ECE105040CFCCC5
Ihttps://youtu.be/wFY2-j6AU6E?list=PL6ECE105040CFCCC5
Thttps://youtu.be/CuaYTiczL7k?list=PL6ECE105040CFCCC5
Jhttps://youtu.be/0CSISWPv5vI?list=PL6ECE105040CFCCC5

A budget-friendly OT tool that comes in very handy is painter’s tape or washi tape. Washi tape is a decorative paper tape. It’s thin, durable and comes in a variety of colors, patterns, textures and widths. The tape is easy to stick on many surfaces, including wood, plastic, and metal. It is easy to remove without causing damage. It’s relatively easy to tear and it doesn’t leave a sticky residue behind, making it especially ideal for OT activities and craft projects alike.

  1. Make a balance “beam” or a hopscotch board on the floor
  2. Create an obstacle course
  3. Teach children to peel tape off the table to work on fine motor skills
  4. Make an X on the wall and teach your kids to throw at a target
  5. Tape worksheets to the wall because working on a vertical surface promotes proper grasp skills, shoulder strengthening and wrist stability
  6. Create numbers, letters and shapes
  7. Create tape art

Are you dealing with children going stir-crazy and can’t sit still?  Having a hard time coming up with new and creative ideas to keep them entertained, without using a screen?  Try fitting in some movement activities to help calm them with some fun yoga. For Movement Monday, I would like to introduce you to Kids Yoga Stories https://www.kidsyogastories.com/. It is an excellent resource of what yoga is, what is a yoga story, the benefits of yoga stories, common yoga poses, etc. It has some amazing free printable yoga posters with several different themes, such as ocean, superhero, unicorn, etc. Below is a snapshot of a partial poster, but check out the website for the entire poster and more! I subscribed to her website, so I get frequent updates of new resources and activities. I would recommend you do the same, so your child doesn’t miss out on the fun!

Welcome to the 5th edition of OT Friday Fun Fine Motor Newsletter. Today we are going to learn how to make a pinwheel. Ironically, it goes along with one of the mindfulness activities that was introduced yesterday. However, it’s also just a fun springtime activity to do. You can decorate your pinwheel anyway you like. After it’s completed, it can be used for a mindfulness breathing activity or it could simply be used for some decoration in a flower pot or garden.

Ways to Incorporate Handwriting:
• Complete the template worksheets that involve handwriting. On each wing write and complete the following statements: (1) Something I love about my school is… (2) Something I love about my family is… (3) Something I love to do during spring is… (4) Something I love to do outside is…
• Have your student write out the steps for making a pinwheel
• Ask your student to write a story about the pinwheel
• Have your student write their name on each wing of the pinwheel

If you don’t have a printer, here are the steps to make a pinwheel.

Today, for Thinking Thursday, I want to focus on mindfulness. Mindfulness is being present and totally engaged in the moment. The understanding of its theory and practice of mindfulness with children is becoming more widespread because of it’s proven benefits and society’s increased awareness of mental health. It will help improve the overall behavior and emotional well-being of all children. It allows children to pay attention and focus on body sensations and feelings as they happen. It gives them the ability to adjust and cope with the stress of every day life. There are several benefits of practicing mindfulness with our children in the classroom and at home.

  1. Strengthens self-control
  2. Lowers stress and anxiety
  3. Increases positive moods
  4. Better decision making
  5. Improves emotional regulation skills
  6. Increases self-esteem
  7. Improves health and body image
  8. Improves social skills and communication

There are several great resources out there and I wanted to share one with you that I found. Teach Starter has some amazing resources for teachers, but many of the resources can also be used at home. Please check out their website: https://www.teachstarter.com/us/blog/classroom-mindfulness-activities-for-children-us/ They have 18 different, 5-10 minute mindfulness activities listed on their website. They also have some great free handouts and/or packets that can be downloaded. I attached three great resources for your convenience, but please take a look at their website and try some of the activities with your child.