Identifying Body Parts

Today, let’s work on identifying body parts!

  • Show your child the parts of their face in a mirror
  • Have your child point to the parts of their face, then have them point to yours
  • Ask them to do things with their body. For example – close your eyes, open your mouth, clap your hands, tap your foot

Here are some great songs that sing about different parts of the body:

Letter of The Week “W”

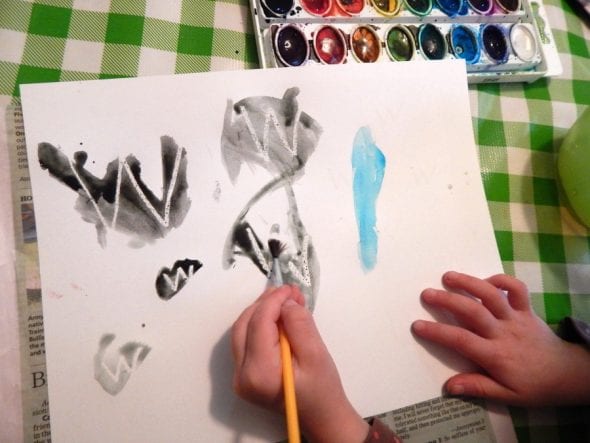
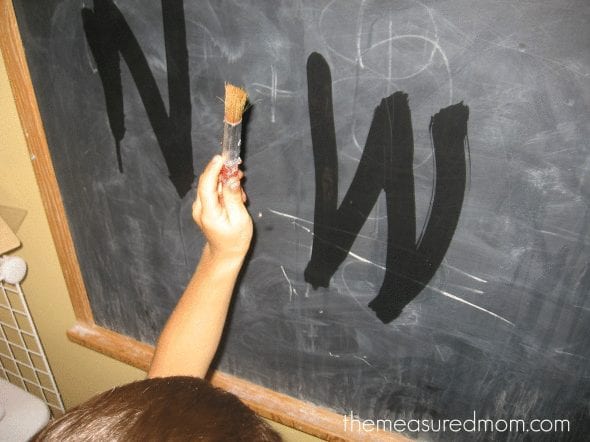
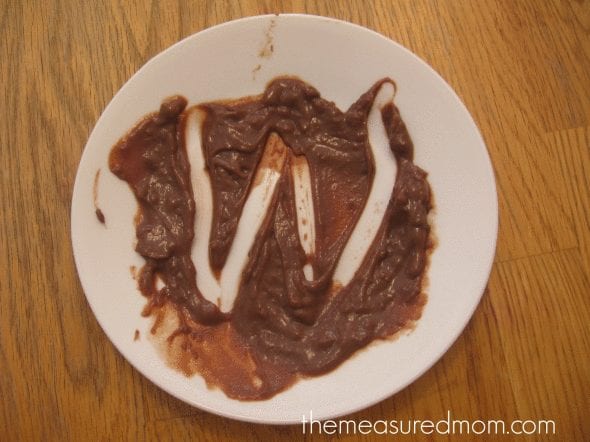
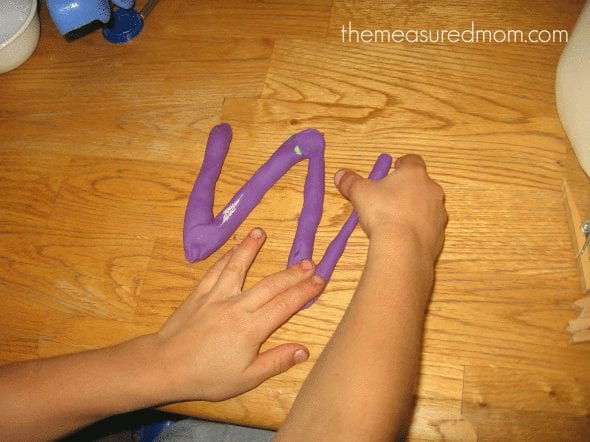
This week is all about the letter “W”. Here are some fun ways to practice making the letter. I also have some fun arts and crafts ideas you can do at home!

Write the letter W all over a piece of card stock using white crayon. Then have your child hunt for it by painting the card stock page.
You can make the letter W by putting your fingers together.
Painting with water is a favorite way to make letters.
Practice writing letters in chocolate pudding!
Practice forming the letter W with play dough. The play dough mats will be delivered soon if you have not got them yet!

Paper Plate Art:

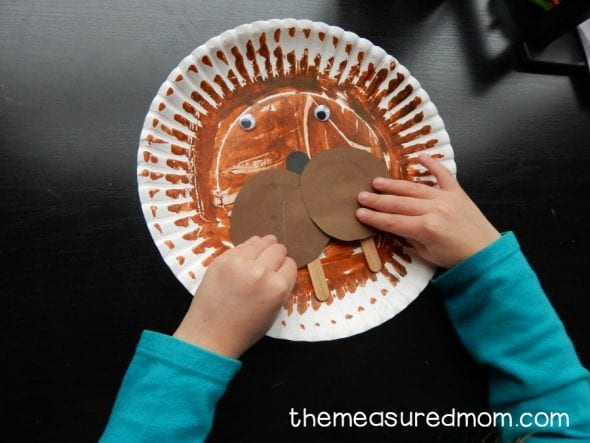
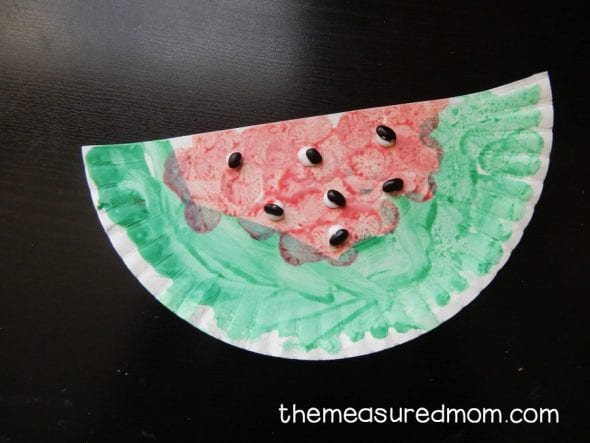
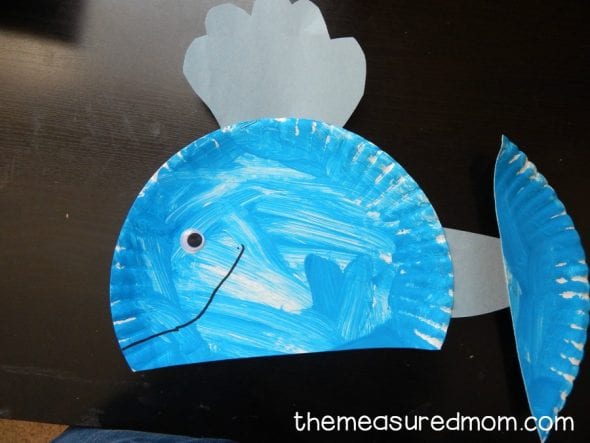
All of the following arts projects can be made with paper plates.

“W” is for walrus! For this activity all you need is a paper plate, brown paint/or maker, construction paper for the nose /mouth, googly eyes, and popsicle sticks for the teeth.
“W” is for watermelon! For this activity all you need is a paper plate and either paint or markers to color the watermelon. You can glue seeds on the top to look like a real watermelon.
“W” is for whale! For this activity you need a paper plate, blue paint/marker, construction paper, glue, and a googly eye.

Let’s Read!

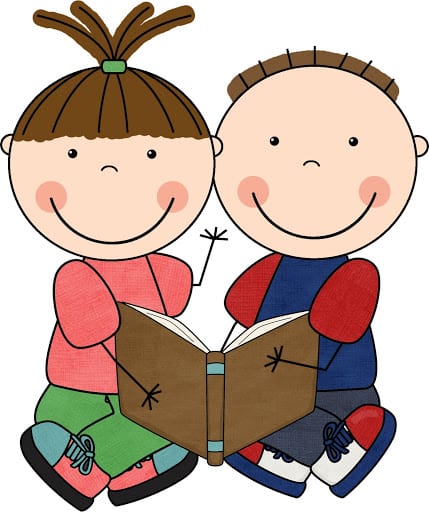
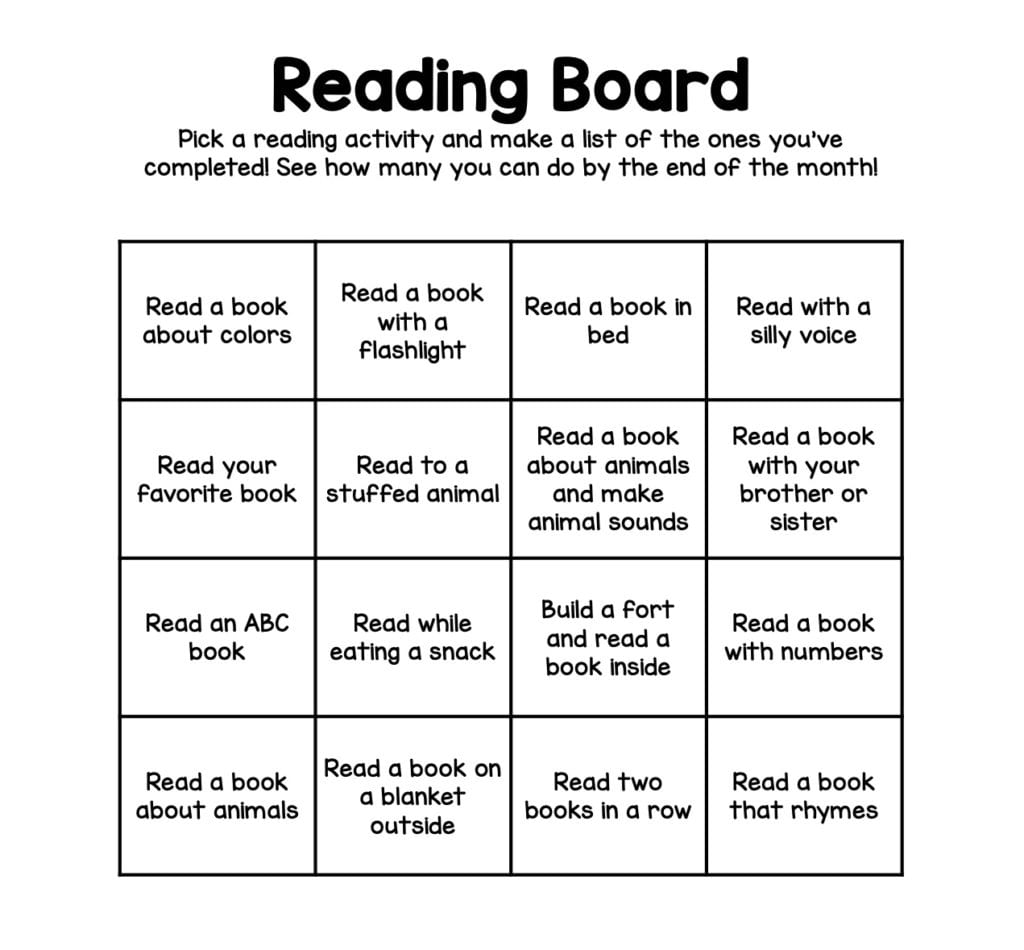
Reading to your child is important. Reading helps your child get to know sounds, words, language, and develop literacy skills. Make time to read to your child once a day. Virtual read-a-loud books are great too!

Have a great EID and Memorial Day weekend! I will post again on Tuesday!

Self Help Thursdays

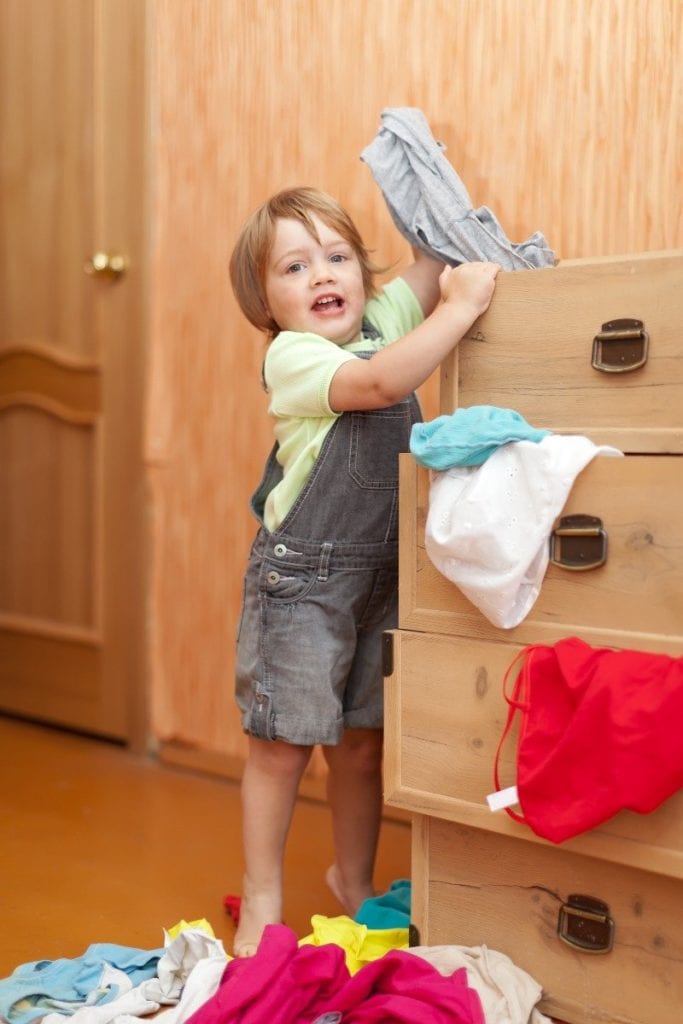
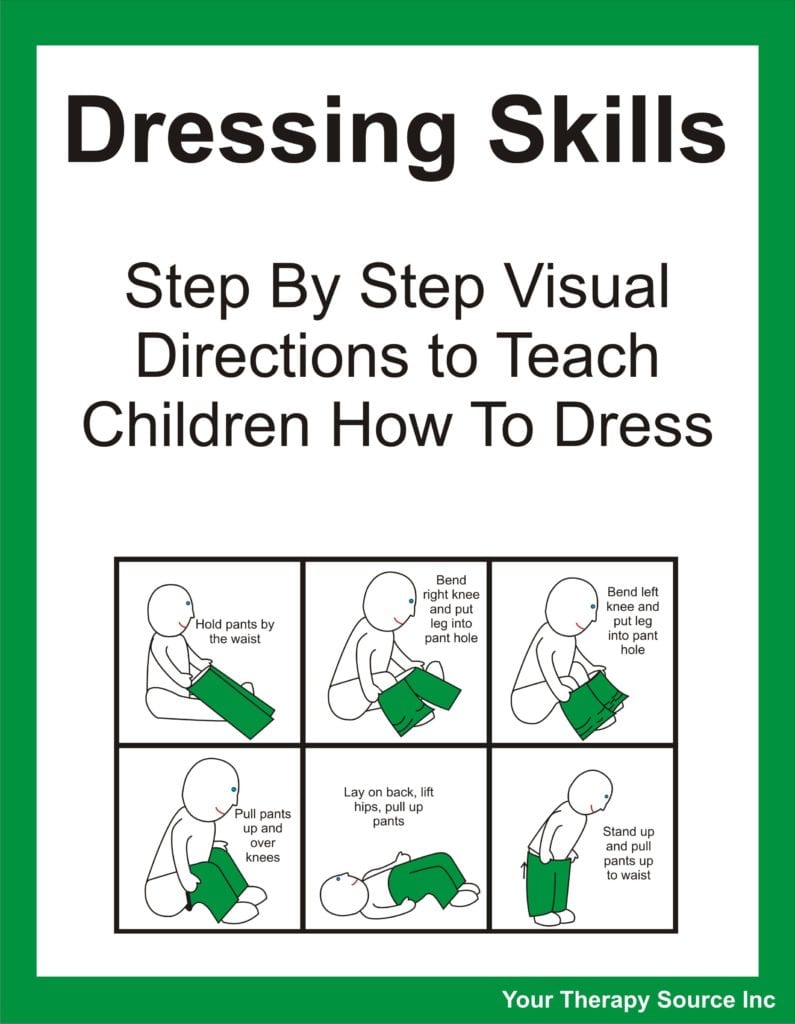
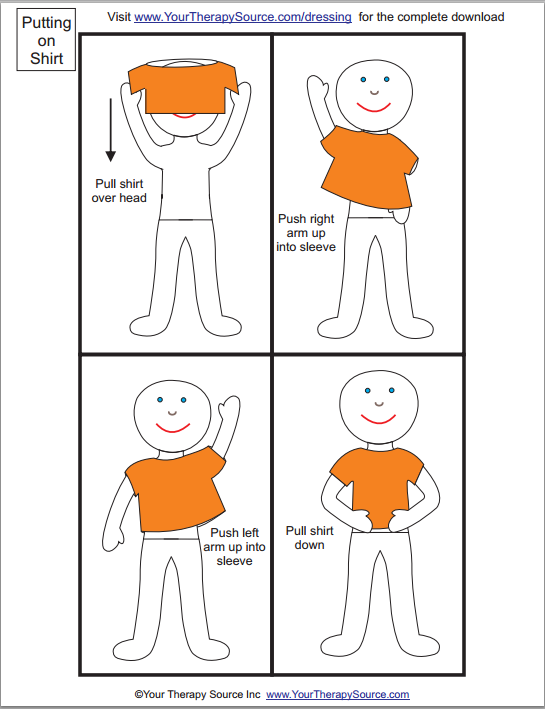
Tips to Make Independent Dressing Easier for Your Child

Little changes can make a big difference in limiting your child’s frustration while dressing. Check out these tips to make getting dressed

  • Dress your child in front of a mirror so they can see what’s happening.
  • Use loose clothing with no fasteners (think t-shirts and sweatpants) and start when you have plenty of time and patience.
  • Lay the clothes out in order or stack them with the first thing to put on at the top. Lay them out in the shape of a body to help with visualization or create a picture board so your child can see each step and knows what to do next.
  • Place your hand over theirs to help guide their movements (hand over hand technique).
  • Offer a choice, “You can wear the green shirt or the red shirt”.

Tips for socks and shoes:

  • Ankle socks are easier to practice with than regular socks because they have less material.
  • Colored heels help your child put on socks the right way.
  • Draw a smiley face on the shoe tongue and tell your child they need to see all of it, even the smile, to get the shoe open enough to put their foot in.
  • Start with slip-on or hook and loop shoes. If they already have lace up shoes, use no-tie elastic laces.
  • Trouble getting shoes on the correct feet? Cut a sticker in half and put half against the inner side of each shoe. Now your child can match them up to make the smiley face, puppy dog, or whatever favorite character you choose.

Here are helpful visuals for dressing:

Fine Motor Wednesday!

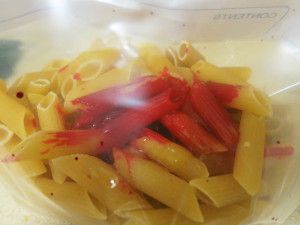
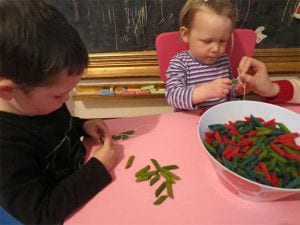
Lets make pasta necklaces today! Not only is this a fun art project, but it helps with developing fine motor skills.

Materials Needed:

  • Dried tube pasta (choose shape to meet your child’s ability level)
  • Zip-lock bags
  • Colored food dyes of your choice
  • Optional: glitter
  • Cling wrap
  • Hand sanitizer (alcohol, no-wash type)
  • String
  • Scissors

Part 1:

  1. Pour some pasta into a bag (as much as you want to dye a certain color)
  2. Add a few squirts of hand sanitizer (this helps make the color stick to the pasta)
  3. Add a few drops of food dye
  4. Optional: sprinkle in some glitter
  5. Close bag and mix well until all pasta is the desired color
  6. Lay out cling wrap flat on counter top.
  7. Spread pasta flat over cling wrap to dry.
  8. Leave to dry overnight.
  9. Repeat as many times are you like with various colors of food-dye.
  10. Children can help with the preparation of this activity. Ask them what colors they would like the pasta to be or what color you are using.

Part 2 (making the necklace):

  • Put all the dry colored pasta into a large bowl. (Your child may enjoy doing the pouring or just putting their hands through the pasta as a sensory activity.)
  • Take a length of string and cut to desired length (for use as a bracelet/necklace/crown). Remember that once string has pasta on it, it will become a bit shorter.
  • Ask your child to choose a piece of pasta and thread onto string. Wrap the string around the first piece of pasta and knot it to create a stopper, so the other pieces do not fall off the string.
  • Ask your child to thread the string through the pasta until the thread is full. As your child does this, take the opportunity to ask them about:
    • How many pieces of pasta they think they will need and then count the pieces at the end to see how close they were.
    • Talk about the colors of pasta they are using and in what order – discuss patterns.
    • If you are using different types of pasta, take the opportunity to discuss the shapes of e.g.  macaroni vs penne pasta – what do they resemble in real life?
  • Tie a knot between the two ends of the string to create a necklace/bracelet.

Please send pictures! I would love to see your creations!

Math Tuesday!

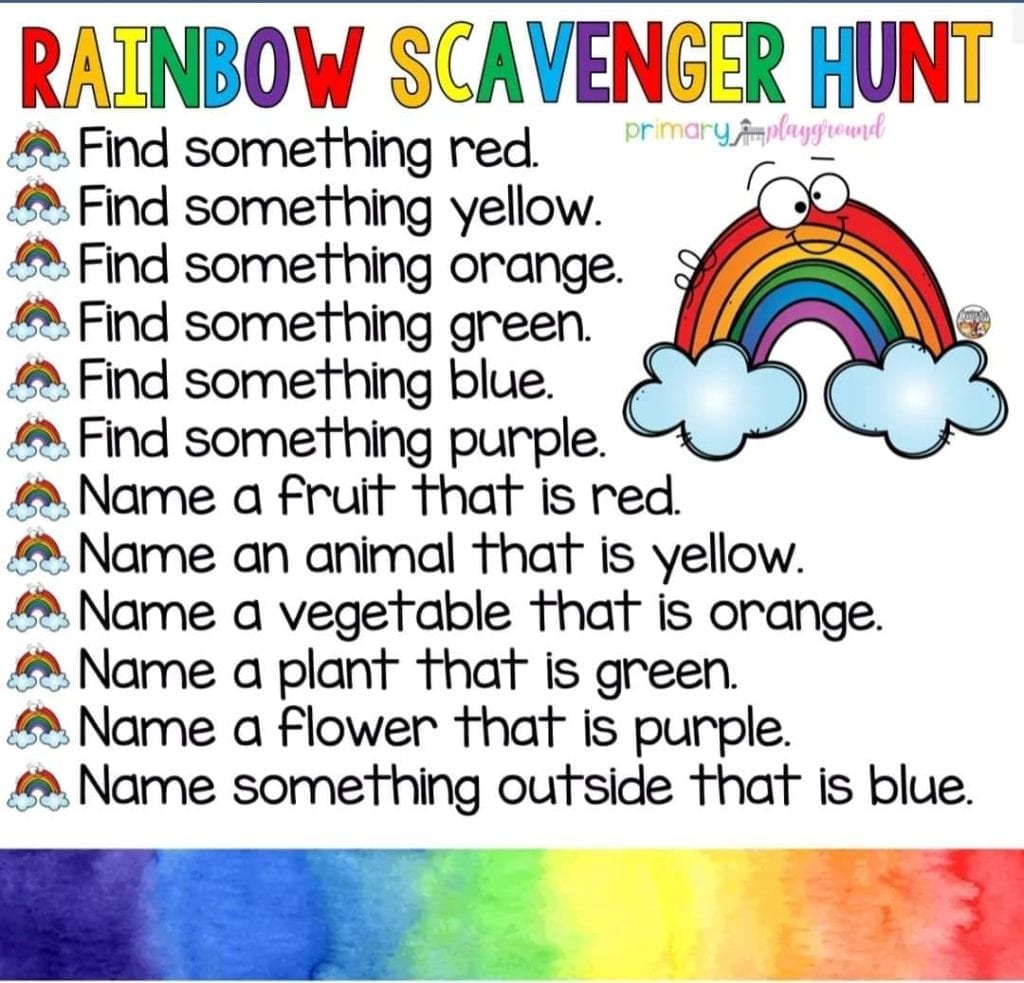
Here is a fun color scavenger hunt that can be done indoors/outdoors. This week is supposed to be warmer, get out and enjoy the sunshine! I also attached our rainbow song we play in class and “The Rainbow Fish” read along.

Letter of The Week “V”

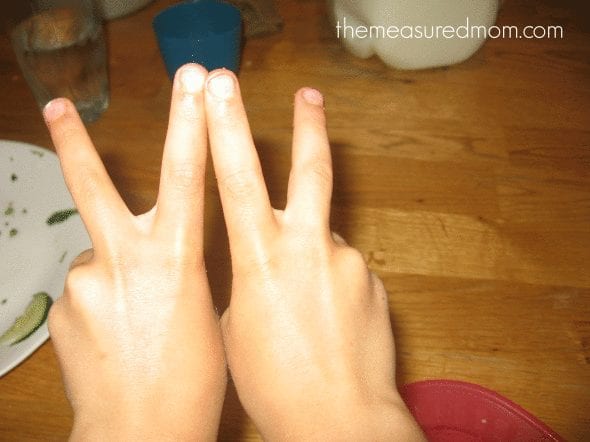
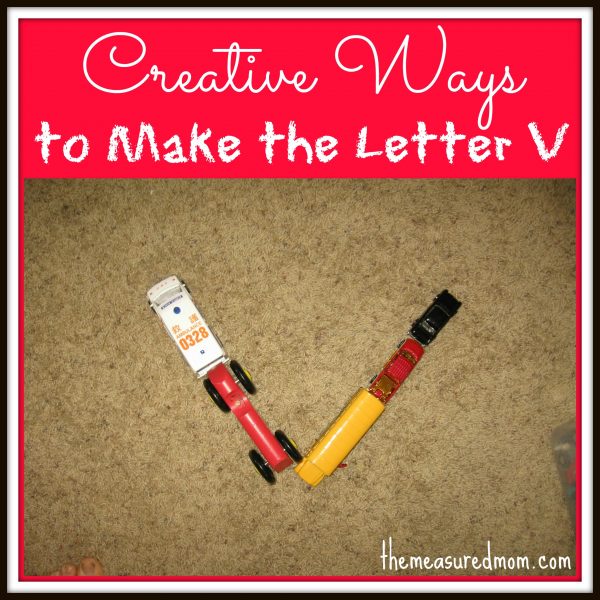
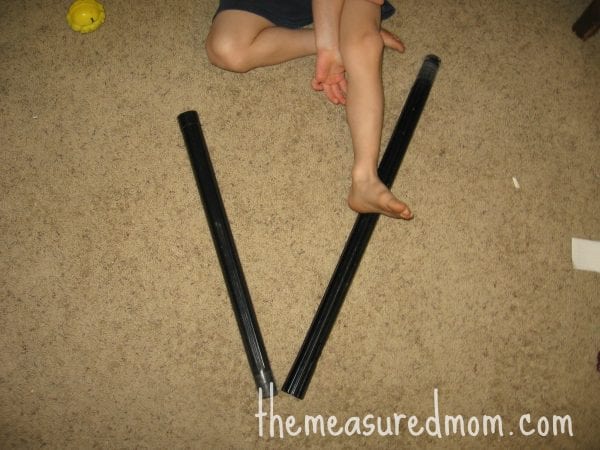
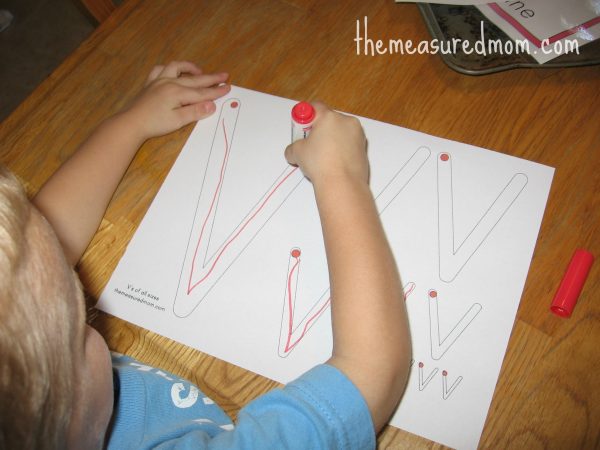
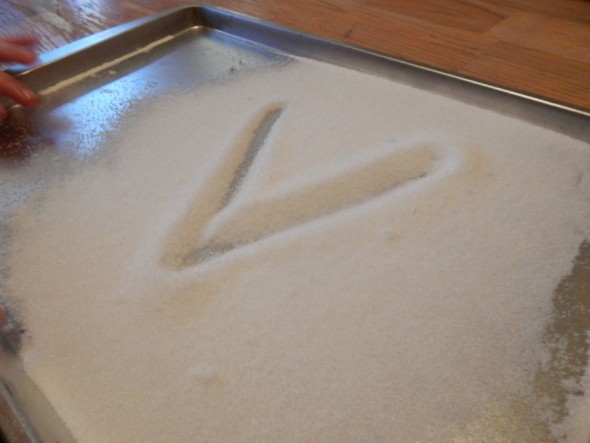
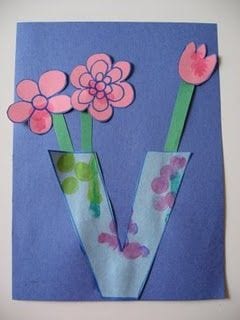
This week is all about the letter “V”. Here are some fun ways to practice making the letters with items around your home!

“V” Is for vehicle! Make the letter “V” out of toy cars!

” V” is for veggies! Practice making the letter with vegetables before having a snack.
“V” is for vacuum! Make the letter out of vacuum accessories.
Use a maker, pen, crayon, or pencil to trace the letters. (These tracing packets are coming home if you haven’t received them yet).
Make a salt tray! Put salt on a tray, and use your fingers to practice forming the letters.
Play-dough mats are coming home! Use play-dough to practice making the letter.

Fun Art Activities!

Here are some fun art activities we would be making at school that you can now make at home.

“V” is for volcano! Try making a volcano out of the letter “V”. All you need is construction paper, glue, and paint for the lava.
“V” is for vase! Try making a vase out of the letter “V”. Again, all you need is construction paper, glue, and paint!

Science Experiment:

You can recreate an erupting volcano at home. All you need is baking soda and vinegar. I would recommend doing it outside or in some sort of a container.

Matching Letters

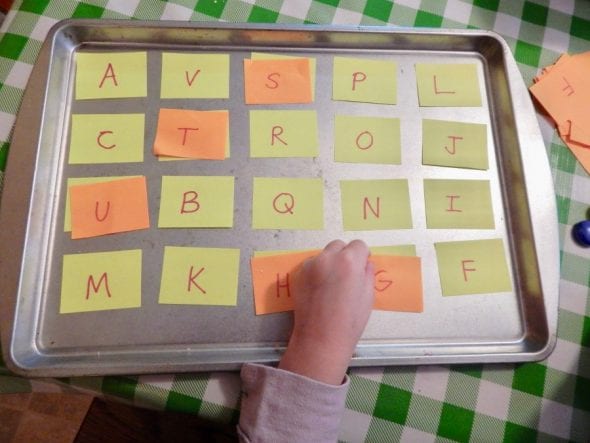
Hi everyone. I came across a fun way to practice matching your letters at home. Make 2 sets of alphabet letters on post-its. Stick one of the sets on a baking sheet. Give your child the other set and have them match the letters by sticking them on one another. You can practice saying the letters out loud as they take turns matching them. Start out with uppercase letters first. Once the uppercase letters are mastered, you can make all of the letters lowercase. To make it more challenging, you can have your child match the lowercase letters to their corresponding uppercase letters. Have fun!